Tag: SustainableLiving

  • Sustainable Agriculture Design: Introduction to Permaculture Principles

    Sustainable Agriculture Design: Introduction to Permaculture Principles

    Welcome back, fellow homesteaders! This week, we’re embarking on an exciting journey into the world of permaculture. Based on the book “Introduction to Permaculture” by Bill Mollison and Reny Mia Slay, we’ll explore the principles and design strategies that can transform your garden into a self-sustaining ecosystem. Permaculture is a holistic approach to agriculture that works with nature, rather than against it, to create resilient and productive systems.

    Affiliate Disclaimer: 

    This post may contain affiliate links, which means I may receive a small commission at no additional cost to you if you make a purchase through these links. Thank you for supporting my blog and allowing me to continue to bring you valuable content.

    Introduction to Permaculture Principles

    Permaculture is a design philosophy that aims to create sustainable and self-sufficient agricultural systems. It is based on three core ethics and a set of design principles that guide the creation and maintenance of these systems.

    Core Ethics:

    1. Earth Care: Prioritize the health of the planet, ensuring that all systems work in harmony with the natural environment.

    2. People Care: Meet the needs of people by providing healthy food, clean water, shelter, and community.

    3. Fair Share: Distribute surplus resources and ensure that everyone has access to what they need.

    Permaculture Design Principles:

    1. Observe and Interact: Take the time to observe natural systems and interact with them thoughtfully to understand how they function.

    2. Catch and Store Energy: Design systems to capture and store energy from the sun, wind, and water for future use.

    3. Obtain a Yield: Ensure that the systems you create produce useful outputs such as food, water, and energy.

    4. Apply Self-Regulation and Accept Feedback: Monitor your systems, make adjustments as needed, and learn from both successes and failures.

    5. Use and Value Renewable Resources and Services: Utilize resources that are abundant and sustainable, minimizing reliance on finite resources.

    6. Produce No Waste: Design systems to minimize waste by reusing and recycling materials wherever possible.

    7. Design from Patterns to Details: Start with a broad vision and gradually refine the details of your design.

    8. Integrate Rather Than Segregate: Create interconnected systems where elements support and benefit each other.

    9. Use Small and Slow Solutions: Focus on small-scale, incremental changes that are easier to manage and more sustainable.

    10. Use and Value Diversity: Cultivate a diverse range of plants, animals, and microorganisms to increase resilience.

    11. Use Edges and Value the Marginal: Utilize the edges of systems, where different environments meet, to maximize productivity.

    12. Creatively Use and Respond to Change: Be adaptable and innovative in response to changing conditions and new information.

    Key Design Strategies for Sustainable Agriculture

    Permaculture design strategies incorporate these principles to create sustainable agricultural systems. Here are some key strategies:

    1. Zone Planning:

    • Divide your homestead into zones based on how frequently you visit each area. Place frequently visited elements, like your kitchen garden, close to your home, and less frequently visited elements, like orchards or woodlots, further away.

    2. Swales and Contour Planting:

    • Create swales (ditches on contour) to capture and store rainwater, preventing erosion and providing moisture to plants. Plant along the contours to maximize water retention.

    3. Polyculture and Guilds:

    • Grow a diverse range of plants together in mutually beneficial groups called guilds. For example, a fruit tree guild might include the tree itself, nitrogen-fixing plants, ground covers, and pest-repellent plants.

    4. Forest Gardening:

    • Mimic natural forest ecosystems by creating multi-layered gardens with canopy trees, understory shrubs, herbaceous plants, ground covers, and root crops. This approach maximizes space and diversity.

    5. Natural Building Techniques:

    • Use sustainable building materials and methods to construct shelters, greenhouses, and other structures. Techniques like cob building, straw bale construction, and earthbag building are eco-friendly and energy-efficient.

    Examples of Successful Permaculture Systems

    Permaculture has been successfully applied around the world in a variety of climates and contexts. Here are a few inspiring examples:

    1. Zaytuna Farm, Australia:

    • Founded by Geoff Lawton, Zaytuna Farm is a demonstration site for permaculture principles. It features diverse systems including food forests, animal systems, aquaculture, and composting toilets.

    2. The Permaculture Research Institute of Australia:

    • Another project by Geoff Lawton, this site includes extensive gardens, water management systems, and educational programs that showcase permaculture in action.

    3. The Bullock’s Permaculture Homestead, Washington, USA:

    • This family-run homestead integrates fruit trees, vegetables, animals, and natural buildings. It demonstrates how permaculture can thrive in a temperate climate.

    4. The Greening the Desert Project, Jordan:

    • Geoff Lawton’s project in the arid climate of Jordan showcases how permaculture can restore degraded land, improve soil fertility, and create sustainable food systems in challenging environments.

    Conclusion

    Permaculture principles offer a powerful framework for designing sustainable and resilient agricultural systems. By observing natural systems, capturing energy, minimizing waste, and fostering diversity, you can create a thriving permaculture garden on your homestead.

    Stay tuned for next week’s post, where we’ll dive deeper into practical examples and guide you through designing your own permaculture garden based on the principles outlined in “Introduction to Permaculture.”

    Happy Homesteading!

    Feel free to ask any questions or share your thoughts in the comments. Let’s continue to learn and grow together!

  • Boost Your Garden’s Health and Yield with Strategic Crop Choices and Rotation Practices

    Boost Your Garden’s Health and Yield with Strategic Crop Choices and Rotation Practices

    Welcome back, fellow homesteaders! We’ve explored soil testing and soil health over the past few weeks, and we are on week 4 of 8! Halfway there!
    Now it’s time to venture into the exciting world of crop selection and rotation. Choosing the right crops and practicing crop rotation can significantly enhance your garden’s productivity, reduce pest problems, and improve soil health. Let’s get started!

    Choosing the Right Crops for Your Homestead

    Selecting the right crops for your homestead is a crucial step in planning a successful garden. Here are some factors to consider:

    1. Climate and Growing Season:

    • Choose crops that thrive in your local climate and match your growing season. Research the average frost dates and growing zones for your area.

    2. Soil Type and Conditions:

    • Consider your soil’s pH, nutrient levels, and drainage. Some crops prefer specific soil conditions.

    3. Personal Preferences:

    • Grow what you and your family enjoy eating. There’s no point in growing a bountiful crop of something no one likes!

    4. Crop Diversity:

    • Plant a variety of crops to ensure a diverse and resilient garden. This can also help spread the risk of crop failure.

    Examples of Easy-to-Grow Crops:

    Leafy Greens: Lettuce, spinach, kale.

    Root Vegetables: Carrots, radishes, beets.

    Fruiting Vegetables: Tomatoes, peppers, cucumbers.

    Legumes: Beans, peas.

    Benefits of Crop Rotation and Companion Planting

    Crop Rotation:

    Crop rotation involves changing the type of crops grown in a particular area each season. This practice offers several benefits:

    Nutrient Management: Different crops have varying nutrient needs. Rotating crops helps prevent nutrient depletion and balances soil fertility.

    Pest and Disease Control: Many pests and diseases are crop-specific. Rotating crops disrupts their life cycles and reduces infestations.

    Soil Health: Crop rotation improves soil structure and organic matter content, leading to healthier soil.

    Companion Planting:

    Companion planting involves growing certain plants together to enhance growth, deter pests, and improve yields. Here are some popular companion planting combinations:

    Tomatoes and Basil: Basil repels tomato hornworms and enhances tomato flavor.

    Carrots and Onions: Onions repel carrot flies, while carrots deter onion flies.

    Beans and Corn: Beans fix nitrogen in the soil, benefiting corn, while corn provides support for bean vines.

    Planning Your Garden Layout

    A well-planned garden layout maximizes space, promotes healthy plant growth, and makes maintenance easier. Here’s how to plan your garden layout:

    1. Map Your Garden:

    • Draw a rough sketch of your garden space, noting areas with full sun, partial shade, and other important features like water sources.

    2. Divide into Sections:

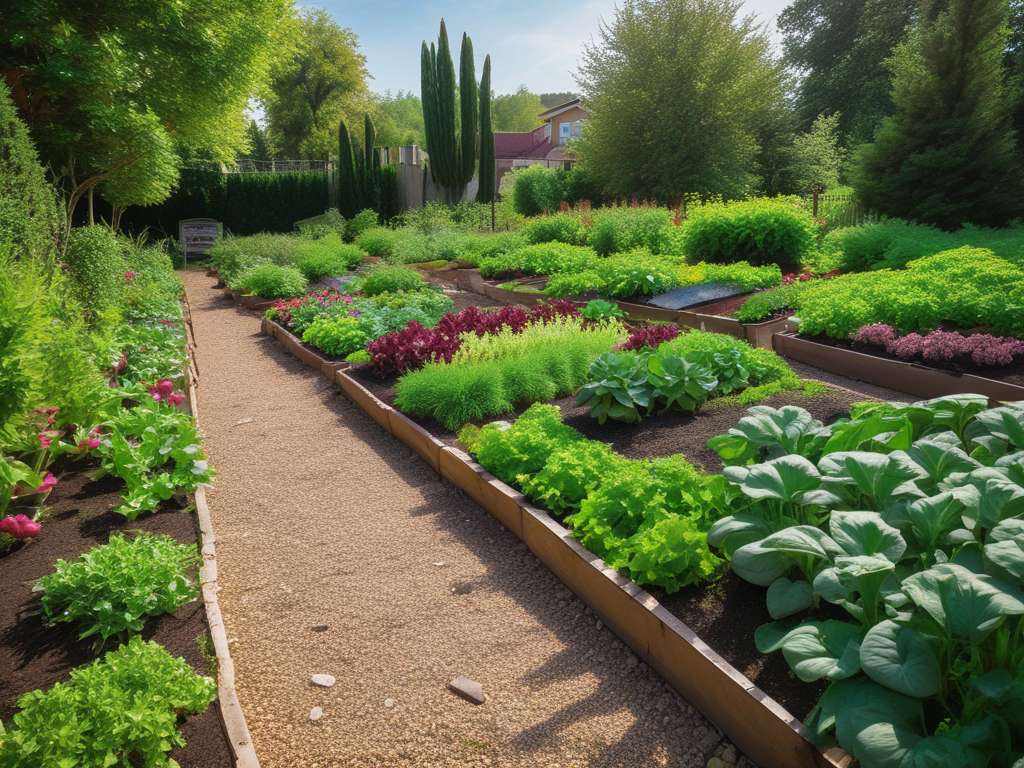
    • Divide your garden into sections or beds. Raised beds or defined plots help organize your planting areas.

    3. Arrange Crops Strategically:

    • Group plants with similar needs together. Place taller plants where they won’t shade shorter ones.

    • Consider crop rotation and companion planting when deciding where to place each crop.

    4. Allow for Accessibility:

    • Ensure paths between rows or beds for easy access to plants for watering, weeding, and harvesting.

    5. Succession Planting:

    • Plan for succession planting to maximize productivity. As soon as one crop is harvested, plant another in its place.

    Example Garden Layout:

    Bed 1: Leafy greens (lettuce, spinach, kale) in the spring, followed by carrots and onions in the summer.

    Bed 2: Beans and corn as companion plants, followed by a fall planting of garlic and radishes.

    Bed 3: Tomatoes and basil, followed by a cover crop of clover to enrich the soil over winter.

    Conclusion

    Choosing the right crops and practicing crop rotation are fundamental to a successful and sustainable garden. By selecting crops suited to your climate and soil, utilizing companion planting, and planning your garden layout strategically, you’ll maximize your garden’s yield and health.

    Share your crop selection and garden planning experiences in the comments below, and let’s continue to learn and grow together.

    Stay tuned for next week’s post, where we’ll dive into permaculture principles and how they can transform your garden into a self-sustaining ecosystem.

    Happy Homesteading!

    Feel free to ask any questions or share your thoughts in the comments. Let’s continue to learn and grow together!

  • How to Design and Maintain a Wildlife-Friendly Garden for Biodiversity

    How to Design and Maintain a Wildlife-Friendly Garden for Biodiversity

    A wildlife-friendly garden is not only a beautiful and dynamic space but also a vital component of a healthy ecosystem. By attracting beneficial animals like birds, bees, and butterflies, you can enhance the biodiversity of your homestead and promote a thriving garden. Here are some tips on how to design and maintain a garden that welcomes and supports these important creatures.

    Why Attract Beneficial Wildlife?

    The Importance of Beneficial Wildlife

    Pollination: Bees, butterflies, and other pollinators are essential for the reproduction of many plants, including fruits and vegetables. They help ensure a bountiful harvest.

    Pest Control: Birds, ladybugs, and other beneficial insects help control pest populations, reducing the need for chemical pesticides.

    Soil Health: Creatures like earthworms and certain beetles aerate the soil and help decompose organic matter, improving soil structure and fertility.

    Biodiversity: A diverse garden ecosystem supports a variety of plants and animals, creating a balanced and resilient environment.

    Designing a Wildlife-Friendly Garden

    Plant a Variety of Native Plants

    Native plants are adapted to your local climate and soil conditions, making them more attractive to local wildlife.

    Diverse Plantings: Include a mix of flowering plants, shrubs, and trees to provide food and habitat for different species.

    Seasonal Blooms: Choose plants that bloom at different times throughout the year to provide a continuous food source for pollinators.

    Provide Water Sources

    Water is essential for all wildlife. Incorporate features like birdbaths, small ponds, or shallow dishes to attract a variety of animals.

    Birdbaths: Keep birdbaths clean and filled with fresh water. Place them in a safe location away from predators.

    Ponds: Even a small pond can attract frogs, insects, and birds. Add aquatic plants to create a balanced ecosystem.

    Create Shelter and Habitat

    Provide safe places for wildlife to nest, hide, and overwinter.

    Nest Boxes: Install birdhouses and bat boxes to provide nesting sites.

    Brush Piles and Logs: Leave small brush piles, logs, and rocks in your garden to offer shelter for insects, amphibians, and small mammals.

    Dense Plantings: Plant shrubs and dense foliage to create hiding spots for birds and small animals.

    Attracting Specific Beneficial Animals

    Birds

    Birds help control pests and pollinate plants. Attract them with food, water, and shelter.

    Feeders: Set up bird feeders with a variety of seeds to attract different species.

    Plants for Birds: Grow plants that produce berries and seeds, such as sunflowers, coneflowers, and elderberries.

    Bees

    Bees are crucial pollinators for many plants. Provide nectar-rich flowers and nesting sites.

    Bee-Friendly Plants: Plant flowers like lavender, borage, and clover, which are rich in nectar and pollen.

    Nesting Sites: Provide bee hotels or leave bare patches of soil for ground-nesting bees.

    Butterflies

    Butterflies add beauty to your garden and play a role in pollination. Attract them with colorful flowers and host plants for their larvae.

    Nectar Plants: Grow a variety of nectar-rich flowers like zinnias, marigolds, and asters.

    Host Plants: Include host plants like milkweed for monarchs and parsley for swallowtails, where butterflies can lay their eggs.

    Beneficial Insects

    Insects like ladybugs and lacewings help control pest populations.

    Habitat Plants: Grow plants like dill, fennel, and yarrow that attract beneficial insects.

    Avoid Pesticides: Minimize or eliminate the use of chemical pesticides to protect beneficial insect populations.

    Maintaining a Wildlife-Friendly Garden

    Practice Sustainable Gardening

    Use eco-friendly gardening practices to support a healthy ecosystem.

    Organic Methods: Avoid synthetic fertilizers and pesticides. Use compost and organic mulches to nourish your soil.

    Water Wisely: Use drip irrigation or soaker hoses to minimize water waste. Water early in the morning to reduce evaporation.

    Weed Management: Hand-pull weeds or use organic mulch to suppress them. Avoid herbicides that can harm wildlife.

    Monitor and Adapt

    Regularly observe your garden to see which plants and features attract the most wildlife. Be prepared to make adjustments based on your observations.

    Keep Records: Maintain a garden journal to track the types of wildlife you see and any changes you make to your garden.

    Be Patient: Creating a wildlife-friendly garden takes time. Be patient and allow nature to find its balance.

    Conclusion

    Designing and maintaining a wildlife-friendly garden not only enhances the beauty and vitality of your homestead but also supports a healthy and balanced ecosystem. By incorporating native plants, providing water and shelter, and practicing sustainable gardening, you can attract beneficial wildlife that will help your garden thrive. Embrace the natural world and enjoy the many rewards of a wildlife-friendly garden. Happy gardening!

  • Practical Methods for Improving Soil Health on Your Homestead

    Practical Methods for Improving Soil Health on Your Homestead

    Welcome back, fellow homesteaders! In our previous post, we explored the basics of soil testing and how to determine your soil’s pH and nutrient levels. This week, we’re focusing on practical methods to improve your soil health based on your test results. Healthy soil is the cornerstone of a productive garden, so let’s dive into the techniques that will help you cultivate a thriving homestead.

    Affiliate Disclaimer: 

    This post may contain affiliate links, which means I may receive a small commission at no additional cost to you if you make a purchase through these links. Thank you for supporting my blog and allowing me to continue to bring you valuable content.

    Methods for Amending Soil Based on Test Results

    Once you’ve tested your soil and identified its pH and nutrient levels, the next step is to amend the soil to create optimal growing conditions for your plants. Here are some common soil amendments and how to use them:

    1. Adjusting Soil pH:

    To Raise pH (Reduce Acidity): Add lime (calcium carbonate) or wood ash to your soil. These materials help neutralize acidity and increase pH levels.

    To Lower pH (Increase Acidity): Add sulfur or organic matter like pine needles and peat moss. These materials help increase soil acidity.

    2. Improving Nutrient Levels:

    Nitrogen (N): Add compost, aged manure, or nitrogen-rich fertilizers like blood meal or alfalfa meal. Nitrogen is crucial for leafy growth. (I’m in the process of creating my own!)

    Phosphorus (P): Use bone meal, rock phosphate, or organic fertilizers like fish bone meal. Phosphorus supports root development and flowering.

    Potassium (K): Incorporate wood ash, greensand, or potassium-rich fertilizers like kelp meal. Potassium enhances overall plant health and disease resistance.

    Composting and Mulching Techniques

    Composting and mulching are two powerful techniques to enhance soil health. They help improve soil structure, retain moisture, and provide essential nutrients. Here’s how you can incorporate these practices into your homestead:

    Composting:

    What to Compost: Use kitchen scraps (fruit and vegetable peels, coffee grounds, eggshells), yard waste (grass clippings, leaves, small branches), and other organic materials (paper, cardboard).

    How to Compost: Create a compost pile or use a compost bin. Layer green materials (high in nitrogen) and brown materials (high in carbon) in a 2:1 ratio. Turn the compost regularly to aerate it and speed up decomposition.

    Using Compost: Once the compost has broken down into dark, crumbly soil, incorporate it into your garden beds to enrich the soil.

    Mulching:

    What to Use: Apply organic materials like straw, wood chips, grass clippings, or leaves as mulch.

    How to Mulch: Spread a 2-4 inch layer of mulch around your plants, leaving some space around the stems to prevent rot. Mulching helps retain soil moisture, suppress weeds, and add organic matter to the soil as it decomposes.

    Practical Tips for Maintaining Healthy Soil

    Maintaining healthy soil is an ongoing process. Here are some practical tips to keep your soil in top condition:

    1. Regular Soil Testing: Test your soil every 1-2 years to monitor its pH and nutrient levels. This will help you make timely adjustments and maintain optimal soil health.

    2. Crop Rotation: Rotate your crops each season to prevent nutrient depletion and reduce the risk of pests and diseases. Different plants have different nutrient needs and contribute various organic materials to the soil.

    3. Cover Cropping: Plant cover crops like clover, rye, or vetch during the off-season. These crops help prevent soil erosion, suppress weeds, and add organic matter to the soil when turned under.

    4. Avoid Over-Tilling: Excessive tilling can disrupt soil structure and harm beneficial organisms. Practice minimal tillage to maintain soil health.

    5. Organic Matter: Continuously add organic matter to your soil through compost, mulch, and cover crops. This improves soil structure, water retention, and nutrient availability.

    By following these methods and tips, you’ll create a thriving environment for your plants, leading to healthier crops and a more productive homestead.

    Conclusion

    Improving soil health is essential for any successful garden. By amending your soil based on test results, incorporating composting and mulching techniques, and following practical tips for soil maintenance, you’ll cultivate a fertile and resilient garden. Share your soil improvement experiences and questions in the comments below, and let’s continue to learn and grow together.

    Stay tuned for next week’s post, where we’ll discuss crop selection and rotation to maximize your garden’s productivity.

    Happy Homesteading!

    Feel free to ask any questions or share your thoughts in the comments. Let’s continue to learn and grow together!

  • Herbal Remedies: Grow Your Own Medicine Garden with Peppermint, Chamomile, and More

    Herbal Remedies: Grow Your Own Medicine Garden with Peppermint, Chamomile, and More

    Growing your own herbs not only adds fresh flavors to your cooking but also provides a natural pharmacy right in your backyard. Herbal remedies have been used for centuries to treat common ailments, and many of these powerful plants can be easily cultivated in your garden. This post will discuss various herbs, their uses for natural remedies, and how to harvest, prepare, and use them to treat headaches, colds, minor cuts, and more.

    1. Peppermint

    Uses:

    Headaches: Peppermint is known for its soothing properties that can help alleviate headaches.

    Digestive Issues: It can also ease digestive discomfort and nausea.

    How to Grow:

    Planting: Peppermint prefers partial shade and moist soil. It can be grown in containers to prevent it from spreading excessively.

    Harvesting: Harvest the leaves before the plant flowers by cutting the stems just above the first or second set of leaves.

    How to Use:

    Peppermint Tea: Steep a handful of fresh peppermint leaves in boiling water for 5-10 minutes. Drink the tea to relieve headaches and digestive issues.

    Peppermint Oil: Crush fresh leaves and rub the oil on your temples to ease headache pain.

    2. Chamomile

    Uses:

    Sleep Aid: Chamomile is well-known for its calming effects, making it an excellent remedy for insomnia and anxiety.

    Skin Irritations: It can also soothe skin irritations and minor cuts.

    How to Grow:

    Planting: Chamomile prefers full sun and well-drained soil. It can be grown from seeds or transplants.

    Harvesting: Harvest the flowers when they are fully open, typically in the morning after the dew has dried.

    How to Use:

    Chamomile Tea: Steep dried chamomile flowers in hot water for 5-10 minutes. Drink before bedtime to promote restful sleep.

    Chamomile Compress: Make a strong tea, soak a cloth in it, and apply to irritated skin or minor cuts for relief.

    3. Lavender

    Uses:

    Anxiety and Stress: Lavender is renowned for its calming and relaxing properties.

    Minor Burns and Cuts: It also has antiseptic and anti-inflammatory properties.

    How to Grow:

    Planting: Lavender thrives in full sun and well-drained soil. It prefers a slightly alkaline soil.

    Harvesting: Harvest the flowers when they are in full bloom by cutting the stems just above the leaves.

    How to Use:

    Lavender Sachets: Place dried lavender flowers in a sachet under your pillow to promote relaxation and sleep.

    Lavender Oil: Infuse lavender flowers in oil and apply to minor burns and cuts to soothe and heal.

    4. Echinacea

    Uses:

    Immune Support: Echinacea is commonly used to boost the immune system and fight colds and infections.

    Wound Healing: It also has properties that promote wound healing.

    How to Grow:

    Planting: Echinacea prefers full sun and well-drained soil. It can be grown from seeds or transplants.

    Harvesting: Harvest the flowers and leaves when the flowers are fully open.

    How to Use:

    Echinacea Tea: Steep fresh or dried flowers and leaves in hot water for 10-15 minutes. Drink the tea to help fight off colds and infections.

    Echinacea Salve: Infuse dried echinacea in oil, mix with beeswax, and apply to cuts and wounds to promote healing.

    5. Calendula

    Uses:

    Skin Inflammations: Calendula is excellent for treating skin inflammations, rashes, and minor wounds.

    Digestive Health: It also supports digestive health and can be used to treat ulcers.

    How to Grow:

    Planting: Calendula prefers full sun to partial shade and well-drained soil. It can be grown from seeds.

    Harvesting: Harvest the flowers in the morning after the dew has dried, when they are fully open.

    How to Use:

    Calendula Salve: Infuse calendula flowers in oil, mix with beeswax, and apply to skin irritations and minor wounds.

    Calendula Tea: Steep dried calendula flowers in hot water for 5-10 minutes. Drink the tea to support digestive health.

    Conclusion

    Incorporating herbal remedies into your daily routine can provide natural and effective solutions for common ailments. By growing these herbs in your garden, you can have a ready supply of fresh, potent ingredients to support your health. Remember to consult with a healthcare provider before using herbal remedies, especially if you have any underlying health conditions or are taking medications. Happy gardening and healing!

  • Digging Deeper: Soil Testing 101

    Digging Deeper: Soil Testing 101

    Welcome back, fellow homesteaders! This week, I’m digging into the nitty-gritty of soil science with a focus on soil testing. Understanding the pH and nutrient levels of your soil is crucial for creating a thriving garden. Accurate soil tests can guide you in making informed decisions about soil amendments and crop choices, ensuring a healthy and productive homestead.

    Affiliate Disclaimer: 

    This post may contain affiliate links, which means I may receive a small commission at no additional cost to you if you make a purchase through these links. Thank you for supporting my blog and allowing me to continue to bring you valuable content.

    How to Test Soil pH and Nutrient Levels

    Soil pH and nutrient levels are key indicators of soil health. The pH level determines the acidity or alkalinity of the soil, which affects nutrient availability to plants. Nutrient levels indicate the presence of essential elements like nitrogen, phosphorus, and potassium, which are vital for plant growth.

    Soil pH:

    Acidic Soil: pH less than 7.

    Neutral Soil: pH of 7.

    Alkaline Soil: pH greater than 7.

    Nutrients:

    Nitrogen (N): Promotes leaf and stem growth.

    Phosphorus (P): Essential for root development and flowering.

    Potassium (K): Enhances overall plant health and disease resistance.

    Step-by-Step Guide on Conducting Soil Tests

    Testing your soil is a straightforward process that you can do yourself with a basic soil test kit. Follow these steps to accurately assess your soil’s pH and nutrient levels:

    1. Gather Supplies:

    Soil test kit (available at garden centers or online).

    • Clean trowel or soil probe.

    • Clean containers or plastic bags for soil samples.

    2. Collect Soil Samples:

    • Choose several spots in your garden to get a representative sample.

    • Dig 6-8 inches deep and take a small amount of soil from each spot.

    • Combine the samples in a clean container and mix them thoroughly.

    3. Prepare the Samples:

    • Follow the instructions on your soil test kit for preparing the samples.

    • This usually involves mixing soil with distilled water or a special solution provided in the kit.

    4. Conduct the Tests:

    • Use the test strips or vials included in your kit to measure pH and nutrient levels.

    • Compare the results to the color chart provided with your kit.

    5. Record the Results:

    • Note down the pH and nutrient levels for future reference.

    • Take pictures of the results if needed for visual records.

    Practical Activity: Performing Soil Tests

    This week’s practical activity is to perform soil tests in your garden. Here’s a detailed plan to guide you through the process:

    1. Prepare Your Tools: Ensure you have all the necessary supplies ready, including your soil test kit, trowel, and containers.

    2. Sample Collection: Visit different areas of your garden, collect soil samples as described, and mix them to get a composite sample.

    3. Conduct the Test: Follow the kit instructions to test for pH and nutrient levels.

    4. Analyze the Results: Compare your results with the optimal levels for the crops you plan to grow. Most vegetables thrive in slightly acidic to neutral soil (pH 6.0-7.0).

    Example Analysis:

    • If your soil pH is 5.5, it’s too acidic for most vegetables. You might need to add lime to raise the pH.

    • If your soil lacks nitrogen, consider adding organic compost or a nitrogen-rich fertilizer.

    By understanding your soil’s pH and nutrient profile, you can make targeted adjustments to improve soil health and boost plant growth. Accurate soil testing is the foundation of successful gardening and sustainable agriculture.

    Conclusion

    Testing your soil is a critical step in your homesteading journey. It provides valuable insights into your soil’s health and helps you create a thriving garden. Share your soil testing experiences in the comments below and let us know what you discovered about your soil. Stay tuned for next week’s post, where we’ll discuss methods for improving soil health based on your test results.

    Happy Homesteading!

    Feel free to ask any questions or share your thoughts in the comments. Let’s continue to learn and grow together!

  • Enhance Your Homestead with Soil Science: 8-Week Series

    Enhance Your Homestead with Soil Science: 8-Week Series

    Hello, fellow homesteaders! Welcome to the first post in my new series on sustainable agriculture. Over the next eight weeks, we’ll dive deep into the fascinating world of soil science. Whether you’re new to homesteading or looking to expand your knowledge, this journey will equip you with essential skills and insights to improve your garden and boost your homesteading success.

    Affiliate Disclaimer: 

    This post may contain affiliate links, which means I may receive a small commission at no additional cost to you if you make a purchase through these links. Thank you for supporting my blog and allowing me to continue to bring you valuable content.

    The Importance of Soil in Agriculture

    Soil is the foundation of any successful garden or farm. It’s more than just dirt—it’s a living ecosystem that supports plant growth, holds water and nutrients, and provides a habitat for countless organisms. Healthy soil is crucial for growing nutritious crops and maintaining a sustainable homestead. Understanding soil science will empower you to create and maintain fertile, productive soil, ensuring a bountiful harvest for years to come.

    What We’ll Learn in the Next 8 Weeks

    Over the next eight weeks, we’ll cover the following topics:

    1. Soil Testing Basics: How to test soil pH and nutrient levels.
    2. Improving Soil Health: Methods for amending soil based on test results.
    3. Crop Selection and Rotation: Choosing the right crops and practicing crop rotation.
    4. Permaculture Principles Part 1: Introduction to permaculture design strategies based on the book “Introduction to Permaculture.” by Bill Mollison & Reny Mia Slay
    5. Permaculture Principles Part 2: Practical examples and designing your own permaculture garden based on the book “Introduction to Permaculture.” by Bill Mollison & Reny Mia Slay
    6. Organic Farming Techniques: Natural pest control and sustainable farming practices.
    7. Review and Certification: A comprehensive review of soil science and awarding of certificates and badges.

    By the end of this series, you’ll have a solid understanding of soil science and practical skills to enhance your gardening efforts.

    Reading Assignment: “The Soil Will Save Us” by Kristin Ohlson

    To kick off our soil science journey, we’ll start with a reading assignment: “The Soil Will Save Us” by Kristin Ohlson. This book explores the critical role soil plays in our environment and how we can restore its health through regenerative agricultural practices. Ohlson’s compelling narrative and scientific insights make it an engaging and informative read for anyone interested in sustainable agriculture.

    Reading Tips:

    • Aim to read a few chapters each week.
    • Take notes on key concepts and ideas.
    • Reflect on how the information applies to your own homestead.

    Discussion on the Role of Soil Health

    Soil health is integral to successful agriculture and sustainable living. Healthy soil:

    • Supports Plant Growth: Provides essential nutrients and a stable structure for roots.
    • Enhances Water Retention: Helps retain moisture, reducing the need for frequent watering.
    • Promotes Biodiversity: Hosts a diverse community of organisms that contribute to soil fertility and plant health.
    • Sequesters Carbon: Plays a role in mitigating climate change by storing carbon.

    As we progress through this series, we’ll explore practical ways to improve soil health on your homestead. From soil testing and amendments to permaculture principles and organic farming techniques, you’ll gain valuable knowledge to cultivate a thriving, sustainable garden.

    Stay tuned for next week’s post, where we’ll delve into the basics of soil testing. We’ll guide you through the process of testing your soil’s pH and nutrient levels, a crucial first step in understanding and improving your soil health.

    Happy Homesteading!

    Feel free to share your thoughts and experiences in the comments below. Let’s learn and grow together!

  • LitFoxFarm: A Sustainable Urban Gardening Journey | Growing Guides, Tips & More

    LitFoxFarm: A Sustainable Urban Gardening Journey | Growing Guides, Tips & More

    Hello and welcome to LitFoxFarm!

    I’m Lindsay, an avid gardener with a passion for sustainability and a dream to turn my small urban(ish) space into a thriving, productive farm. Nestled at the tippy top of New Jersey, LitFoxFarm is my journey of transforming a 1/4 acre backyard and front yard into a green oasis filled with fresh vegetables, vibrant flowers, and sustainable practices.

    Why LitFoxFarm?

    Gardening has always been a part of my life, sparked by fond memories of helping my grandfather raise worms and cultivate a small garden. Despite the challenges and a few humorous mishaps along the way, my fascination with growing things never faded. Today, I’m combining my love for gardening with my passion for sustainability, aiming to create a farm that not only feeds my family but also brings joy and inspiration to my community.

    What You Can Expect

    At LitFoxFarm, we believe in the power of variety and the importance of sustainable practices. Here’s what you can look forward to:

    Growing Guides: Detailed guides on how to grow a variety of vegetables, herbs, and flowers, even in small spaces.

    Sustainable Practices: Tips on composting, rainwater collection, and organic pest control to keep your garden eco-friendly.

    Project Updates: Follow along as we expand our garden, introduce new crops, and implement innovative farming techniques.

    Community Connection: Opportunities to connect with fellow gardeners, attend workshops, and share experiences.

    Join Me on This Journey

    Whether you’re an experienced gardener or just starting out, I invite you to join me on this journey of creativity, craftsmanship, and sustainable living, all nurtured with a touch of love. Let’s get our hands dirty and grow something beautiful together!

    Thank you for visiting LitFoxFarm. Stay tuned for more posts filled with tips, tutorials, and updates on our progress. Together, we can cultivate a greener future, one plant at a time.

    Lindsay