Author: Linda Maybe

  • Herbal Remedies: Grow Your Own Medicine Garden with Peppermint, Chamomile, and More

    Herbal Remedies: Grow Your Own Medicine Garden with Peppermint, Chamomile, and More

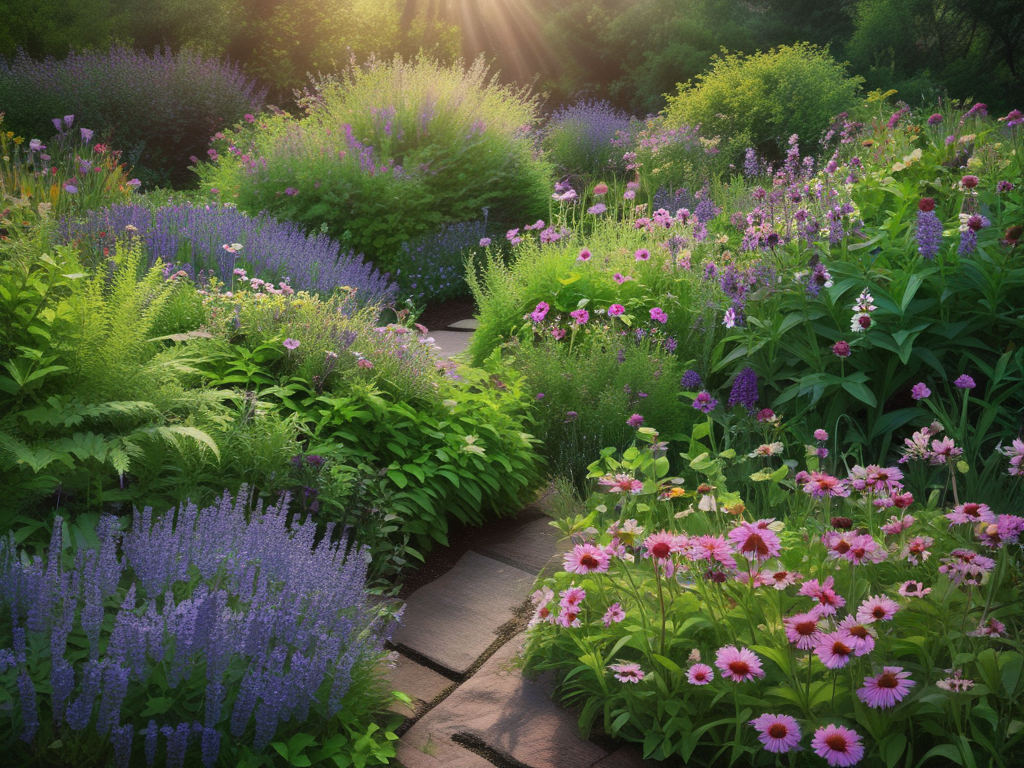
    Growing your own herbs not only adds fresh flavors to your cooking but also provides a natural pharmacy right in your backyard. Herbal remedies have been used for centuries to treat common ailments, and many of these powerful plants can be easily cultivated in your garden. This post will discuss various herbs, their uses for natural remedies, and how to harvest, prepare, and use them to treat headaches, colds, minor cuts, and more.

    1. Peppermint

    Uses:

    Headaches: Peppermint is known for its soothing properties that can help alleviate headaches.

    Digestive Issues: It can also ease digestive discomfort and nausea.

    How to Grow:

    Planting: Peppermint prefers partial shade and moist soil. It can be grown in containers to prevent it from spreading excessively.

    Harvesting: Harvest the leaves before the plant flowers by cutting the stems just above the first or second set of leaves.

    How to Use:

    Peppermint Tea: Steep a handful of fresh peppermint leaves in boiling water for 5-10 minutes. Drink the tea to relieve headaches and digestive issues.

    Peppermint Oil: Crush fresh leaves and rub the oil on your temples to ease headache pain.

    2. Chamomile

    Uses:

    Sleep Aid: Chamomile is well-known for its calming effects, making it an excellent remedy for insomnia and anxiety.

    Skin Irritations: It can also soothe skin irritations and minor cuts.

    How to Grow:

    Planting: Chamomile prefers full sun and well-drained soil. It can be grown from seeds or transplants.

    Harvesting: Harvest the flowers when they are fully open, typically in the morning after the dew has dried.

    How to Use:

    Chamomile Tea: Steep dried chamomile flowers in hot water for 5-10 minutes. Drink before bedtime to promote restful sleep.

    Chamomile Compress: Make a strong tea, soak a cloth in it, and apply to irritated skin or minor cuts for relief.

    3. Lavender

    Uses:

    Anxiety and Stress: Lavender is renowned for its calming and relaxing properties.

    Minor Burns and Cuts: It also has antiseptic and anti-inflammatory properties.

    How to Grow:

    Planting: Lavender thrives in full sun and well-drained soil. It prefers a slightly alkaline soil.

    Harvesting: Harvest the flowers when they are in full bloom by cutting the stems just above the leaves.

    How to Use:

    Lavender Sachets: Place dried lavender flowers in a sachet under your pillow to promote relaxation and sleep.

    Lavender Oil: Infuse lavender flowers in oil and apply to minor burns and cuts to soothe and heal.

    4. Echinacea

    Uses:

    Immune Support: Echinacea is commonly used to boost the immune system and fight colds and infections.

    Wound Healing: It also has properties that promote wound healing.

    How to Grow:

    Planting: Echinacea prefers full sun and well-drained soil. It can be grown from seeds or transplants.

    Harvesting: Harvest the flowers and leaves when the flowers are fully open.

    How to Use:

    Echinacea Tea: Steep fresh or dried flowers and leaves in hot water for 10-15 minutes. Drink the tea to help fight off colds and infections.

    Echinacea Salve: Infuse dried echinacea in oil, mix with beeswax, and apply to cuts and wounds to promote healing.

    5. Calendula

    Uses:

    Skin Inflammations: Calendula is excellent for treating skin inflammations, rashes, and minor wounds.

    Digestive Health: It also supports digestive health and can be used to treat ulcers.

    How to Grow:

    Planting: Calendula prefers full sun to partial shade and well-drained soil. It can be grown from seeds.

    Harvesting: Harvest the flowers in the morning after the dew has dried, when they are fully open.

    How to Use:

    Calendula Salve: Infuse calendula flowers in oil, mix with beeswax, and apply to skin irritations and minor wounds.

    Calendula Tea: Steep dried calendula flowers in hot water for 5-10 minutes. Drink the tea to support digestive health.

    Conclusion

    Incorporating herbal remedies into your daily routine can provide natural and effective solutions for common ailments. By growing these herbs in your garden, you can have a ready supply of fresh, potent ingredients to support your health. Remember to consult with a healthcare provider before using herbal remedies, especially if you have any underlying health conditions or are taking medications. Happy gardening and healing!

  • Digging Deeper: Soil Testing 101

    Digging Deeper: Soil Testing 101

    Welcome back, fellow homesteaders! This week, I’m digging into the nitty-gritty of soil science with a focus on soil testing. Understanding the pH and nutrient levels of your soil is crucial for creating a thriving garden. Accurate soil tests can guide you in making informed decisions about soil amendments and crop choices, ensuring a healthy and productive homestead.

    Affiliate Disclaimer: 

    This post may contain affiliate links, which means I may receive a small commission at no additional cost to you if you make a purchase through these links. Thank you for supporting my blog and allowing me to continue to bring you valuable content.

    How to Test Soil pH and Nutrient Levels

    Soil pH and nutrient levels are key indicators of soil health. The pH level determines the acidity or alkalinity of the soil, which affects nutrient availability to plants. Nutrient levels indicate the presence of essential elements like nitrogen, phosphorus, and potassium, which are vital for plant growth.

    Soil pH:

    Acidic Soil: pH less than 7.

    Neutral Soil: pH of 7.

    Alkaline Soil: pH greater than 7.

    Nutrients:

    Nitrogen (N): Promotes leaf and stem growth.

    Phosphorus (P): Essential for root development and flowering.

    Potassium (K): Enhances overall plant health and disease resistance.

    Step-by-Step Guide on Conducting Soil Tests

    Testing your soil is a straightforward process that you can do yourself with a basic soil test kit. Follow these steps to accurately assess your soil’s pH and nutrient levels:

    1. Gather Supplies:

    Soil test kit (available at garden centers or online).

    • Clean trowel or soil probe.

    • Clean containers or plastic bags for soil samples.

    2. Collect Soil Samples:

    • Choose several spots in your garden to get a representative sample.

    • Dig 6-8 inches deep and take a small amount of soil from each spot.

    • Combine the samples in a clean container and mix them thoroughly.

    3. Prepare the Samples:

    • Follow the instructions on your soil test kit for preparing the samples.

    • This usually involves mixing soil with distilled water or a special solution provided in the kit.

    4. Conduct the Tests:

    • Use the test strips or vials included in your kit to measure pH and nutrient levels.

    • Compare the results to the color chart provided with your kit.

    5. Record the Results:

    • Note down the pH and nutrient levels for future reference.

    • Take pictures of the results if needed for visual records.

    Practical Activity: Performing Soil Tests

    This week’s practical activity is to perform soil tests in your garden. Here’s a detailed plan to guide you through the process:

    1. Prepare Your Tools: Ensure you have all the necessary supplies ready, including your soil test kit, trowel, and containers.

    2. Sample Collection: Visit different areas of your garden, collect soil samples as described, and mix them to get a composite sample.

    3. Conduct the Test: Follow the kit instructions to test for pH and nutrient levels.

    4. Analyze the Results: Compare your results with the optimal levels for the crops you plan to grow. Most vegetables thrive in slightly acidic to neutral soil (pH 6.0-7.0).

    Example Analysis:

    • If your soil pH is 5.5, it’s too acidic for most vegetables. You might need to add lime to raise the pH.

    • If your soil lacks nitrogen, consider adding organic compost or a nitrogen-rich fertilizer.

    By understanding your soil’s pH and nutrient profile, you can make targeted adjustments to improve soil health and boost plant growth. Accurate soil testing is the foundation of successful gardening and sustainable agriculture.

    Conclusion

    Testing your soil is a critical step in your homesteading journey. It provides valuable insights into your soil’s health and helps you create a thriving garden. Share your soil testing experiences in the comments below and let us know what you discovered about your soil. Stay tuned for next week’s post, where we’ll discuss methods for improving soil health based on your test results.

    Happy Homesteading!

    Feel free to ask any questions or share your thoughts in the comments. Let’s continue to learn and grow together!

  • Get Your Garden Groove On with Our Free Weekly Planner: Garden Edition! 🌱

    Get Your Garden Groove On with Our Free Weekly Planner: Garden Edition! 🌱

    Hey there, garden warriors and plant enthusiasts! 🌻

    Let’s be real for a second: gardening is tough. Between the relentless weeds that pop up overnight and the plants that demand attention like divas, it’s easy to feel a bit overwhelmed. If you’ve ever found yourself knee-deep in soil, wondering when you last watered that one particularly thirsty plant, I’ve got just the thing for you. Introducing my freebie of the month: the Weekly Planner: Garden Edition!

    Why You Need This Planner

    If your garden looks anything like mine, it’s a beautiful chaos. I mean, sure, we love our plants like our own children, but even the best of us can’t remember everything. Enter the Weekly Planner: Garden Edition – your new best friend in the garden. This planner is designed to help you stay on top of your garden tasks, ensure your plants get the love they need, and ultimately, help your garden flourish. Because let’s face it, we could all use a little help in remembering when to water the tomatoes and when to give those finicky herbs a bit of extra TLC.

    What’s Inside

    Here’s a sneak peek at what you’ll find in our sassy, ever-so-helpful Weekly Planner:

    Weekly Overview: Get a bird’s eye view of your gardening week. Plot out what needs to be done and when so you’re never caught off guard by an unexpected plant tantrum.

    Daily Task Planner: Break down your tasks day by day. Whether it’s watering, weeding, or just giving your plants some much-needed compliments, you’ll have a space to jot it all down.

    Notes Section: Because let’s be honest, gardens come with their fair share of surprises. Use this section to note down any observations, sudden epiphanies, or those brilliant ideas you get while elbow-deep in compost.

    To-Do List: Keep track of those nagging little tasks that need to be done but often slip through the cracks. Like finally fixing that leaky hose or figuring out why the cucumbers have suddenly decided to play hard to get.

    How to Get Your Hands on It

    Ready to bring some order to your garden chaos? Downloading our Weekly Planner: Garden Edition is as easy as pie (or should I say, as easy as planting a seed?). Just click here to grab your free copy and start organizing your garden like the pro you are.

    Why I Love It

    Honestly, this planner has been a game-changer for me. Before, I was the queen of “Oh no, I forgot to water the basil again!” Now, I’m on top of my game, and my plants are thriving. Plus, there’s something incredibly satisfying about checking off those little boxes each day. It’s like giving myself a high-five for adulting properly.

    Final Thoughts

    So, what are you waiting for? Download the Weekly Planner: Garden Edition and take control of your gardening journey. Let’s turn that beautiful chaos into a well-oiled (and well-watered) machine. Happy gardening, and may your plants be ever in your favor!

    Lindsay 🌿

  • DIY Fourth of July Homestead Activities for Families

    DIY Fourth of July Homestead Activities for Families

    Independence Day is a perfect time to engage in fun and creative activities on your homestead. Whether you’re decorating, crafting, or setting up a backyard picnic, there are plenty of ways to celebrate with DIY projects that the whole family can enjoy. Here are some kid-friendly ideas to make your Fourth of July festive and memorable.

    1. Patriotic Decorations

    DIY American Flag Banners

    Create a festive atmosphere by making your own American flag banners. This simple craft is perfect for kids and adds a patriotic touch to your homestead.

    Materials:

    • Red, white, and blue construction paper

    • Scissors

    • Glue or tape

    • String or ribbon

    Instructions:

    1. Cut the Paper: Cut the construction paper into triangle shapes.

    2. Assemble the Flags: Glue or tape the triangles onto the string or ribbon, alternating red, white, and blue colors.

    3. Hang the Banner: Find a spot to hang your banner, such as along the porch, fence, or garden area.

    Painted Mason Jars

    Painted mason jars can serve as beautiful decorations or functional containers for your picnic.

    Materials:

    • Mason jars

    • Red, white, and blue acrylic paint

    • Paintbrushes

    • Tea lights or small flags (optional)

    Instructions:

    1. Paint the Jars: Let the kids paint the jars in patriotic colors or designs.

    2. Dry and Use: Once dry, use the jars as candle holders, vases, or utensil holders for your picnic.

    2. Backyard Picnic with Homegrown Produce

    Kid-Friendly Recipes

    Involve the kids in preparing a delicious backyard picnic with fresh produce from your garden.

    Fruit Kabobs

    Easy and healthy, fruit kabobs are a hit with kids and adults alike.

    Ingredients:

    • Strawberries

    • Blueberries

    • Watermelon

    • Pineapple

    Instructions:

    1. Prepare the Fruit: Wash and cut the fruit into bite-sized pieces.

    2. Assemble the Kabobs: Let the kids thread the fruit onto skewers, alternating colors for a patriotic look.

    Garden Salad

    Make a fresh garden salad with your homegrown veggies.

    Ingredients:

    • Lettuce

    • Cherry tomatoes

    • Cucumbers

    • Carrots

    Instructions:

    1. Harvest and Wash: Pick the veggies from your garden and wash them thoroughly.

    2. Chop and Toss: Let the kids help chop the veggies and toss them in a bowl with their favorite dressing.

    Picnic Setup

    Create a comfortable and festive picnic area in your backyard.

    Materials:

    • Picnic blanket

    • Cushions

    • Outdoor tableware

    • DIY decorations

    Instructions:

    1. Set the Scene: Spread out the picnic blanket and arrange cushions for seating.

    2. Decorate: Use your DIY decorations, like the painted mason jars and flag banners, to add a festive touch.

    3. Themed Crafts with Crochet

    Crochet American Flag Coasters

    Get the kids involved in making simple crochet projects that are both fun and functional.

    Materials:

    • Red, white, and blue yarn

    • Crochet hook

    • Scissors

    Instructions:

    1. Basic Crochet Skills: Teach the kids basic crochet stitches like the chain stitch and single crochet.

    2. Make the Coasters: Help them create small squares in each color, then sew them together to form a flag pattern.

    Patriotic Bracelets

    Make easy and cute crochet bracelets in patriotic colors.

    Materials:

    • Red, white, and blue yarn

    • Crochet hook

    • Beads (optional)

    • Scissors

    Instructions:

    1. Chain Stitch: Have the kids crochet a long chain in each color.

    2. Assemble the Bracelet: Braid the chains together and add beads if desired. Tie the ends to form a bracelet.

    Conclusion

    Celebrating Independence Day on your homestead with these DIY activities is a fantastic way to enjoy the holiday while creating lasting memories with your family. From making patriotic decorations and preparing a backyard picnic with homegrown produce to crafting themed crochet projects, there’s something for everyone to enjoy. Have a fun and festive Fourth of July!

  • Enhance Your Homestead with Soil Science: 8-Week Series

    Enhance Your Homestead with Soil Science: 8-Week Series

    Hello, fellow homesteaders! Welcome to the first post in my new series on sustainable agriculture. Over the next eight weeks, we’ll dive deep into the fascinating world of soil science. Whether you’re new to homesteading or looking to expand your knowledge, this journey will equip you with essential skills and insights to improve your garden and boost your homesteading success.

    Affiliate Disclaimer: 

    This post may contain affiliate links, which means I may receive a small commission at no additional cost to you if you make a purchase through these links. Thank you for supporting my blog and allowing me to continue to bring you valuable content.

    The Importance of Soil in Agriculture

    Soil is the foundation of any successful garden or farm. It’s more than just dirt—it’s a living ecosystem that supports plant growth, holds water and nutrients, and provides a habitat for countless organisms. Healthy soil is crucial for growing nutritious crops and maintaining a sustainable homestead. Understanding soil science will empower you to create and maintain fertile, productive soil, ensuring a bountiful harvest for years to come.

    What We’ll Learn in the Next 8 Weeks

    Over the next eight weeks, we’ll cover the following topics:

    1. Soil Testing Basics: How to test soil pH and nutrient levels.
    2. Improving Soil Health: Methods for amending soil based on test results.
    3. Crop Selection and Rotation: Choosing the right crops and practicing crop rotation.
    4. Permaculture Principles Part 1: Introduction to permaculture design strategies based on the book “Introduction to Permaculture.” by Bill Mollison & Reny Mia Slay
    5. Permaculture Principles Part 2: Practical examples and designing your own permaculture garden based on the book “Introduction to Permaculture.” by Bill Mollison & Reny Mia Slay
    6. Organic Farming Techniques: Natural pest control and sustainable farming practices.
    7. Review and Certification: A comprehensive review of soil science and awarding of certificates and badges.

    By the end of this series, you’ll have a solid understanding of soil science and practical skills to enhance your gardening efforts.

    Reading Assignment: “The Soil Will Save Us” by Kristin Ohlson

    To kick off our soil science journey, we’ll start with a reading assignment: “The Soil Will Save Us” by Kristin Ohlson. This book explores the critical role soil plays in our environment and how we can restore its health through regenerative agricultural practices. Ohlson’s compelling narrative and scientific insights make it an engaging and informative read for anyone interested in sustainable agriculture.

    Reading Tips:

    • Aim to read a few chapters each week.
    • Take notes on key concepts and ideas.
    • Reflect on how the information applies to your own homestead.

    Discussion on the Role of Soil Health

    Soil health is integral to successful agriculture and sustainable living. Healthy soil:

    • Supports Plant Growth: Provides essential nutrients and a stable structure for roots.
    • Enhances Water Retention: Helps retain moisture, reducing the need for frequent watering.
    • Promotes Biodiversity: Hosts a diverse community of organisms that contribute to soil fertility and plant health.
    • Sequesters Carbon: Plays a role in mitigating climate change by storing carbon.

    As we progress through this series, we’ll explore practical ways to improve soil health on your homestead. From soil testing and amendments to permaculture principles and organic farming techniques, you’ll gain valuable knowledge to cultivate a thriving, sustainable garden.

    Stay tuned for next week’s post, where we’ll delve into the basics of soil testing. We’ll guide you through the process of testing your soil’s pH and nutrient levels, a crucial first step in understanding and improving your soil health.

    Happy Homesteading!

    Feel free to share your thoughts and experiences in the comments below. Let’s learn and grow together!

  • Self-Teaching Homesteading: A Weekly Journey

    Self-Teaching Homesteading: A Weekly Journey

    Hello, fellow gardeners, homesteaders, & worm enthusiasts! I’m excited to introduce a new weekly series on my blog, where I’ll be documenting my journey into the world of homesteading through self-teaching. Every Monday, I’ll share updates, insights, and lessons learned as I delve into various aspects of sustainable living, from raising chickens to growing vegetables and everything in between. I am also cross-posting these to my other site thewormwagon.com, as it just seems fitting.

    A Lifelong Passion for Homesteading

    My passion for homesteading started at a young age. I fondly remember raising chickens and growing lemon trees in the hen house, as well as spending summer hours with my grandfather, learning the art of worm farming. These experiences taught me invaluable life lessons and instilled in me a deep love for self-sufficiency and sustainable living. Being homeschooled through high school, I learned the majority of what I know through experience and self-learning.

    Motivation and Goals

    These days, my motivation stems from a general dissatisfaction with the status quo and the expectations of corporate life. I long to escape these constraints and create a world where I can thrive on my own terms. My dream is to run a happy little homestead, sell my crochet creations, and manage websites where I can teach others to do the same. Ultimately, I hope to quit my day job and let homesteading become my full-time occupation.

    Current Situation and Projects

    I’m currently based in upstate New Jersey, where the mini farm stands along the roadsides have been a source of inspiration. Although I’m working with minimal space and limited sunlight, I’m determined to make the most of what I have. My current projects include the initial stages of a three-bin composter, a worm factory that I hope to expand to supply my community with garden worms and vermicompost, and a mini pumpkin patch. This season, I’m expecting to harvest over 100 mini pumpkins!

    Why Self-Study?

    When I considered formal education in agriculture, I kept asking myself, “Why?” Why spend so much money when I’ve already proven that a certification or a piece of paper isn’t what counts? It’s the experience and skills that truly matter. Inspired by Tim Ferris and his Self-Taught MBA plan, I decided to create my own course plan for homesteading. Being homeschooled, I’m no stranger to self-directed learning, and I’m excited to embark on this new educational journey.

    Join Me on This Adventure

    I invite you to join me on this exciting adventure. Whether you’re a seasoned homesteader or just beginning, I hope my journey will inspire and empower you to pursue your own path to self-sufficiency. Each week, I’ll share detailed updates on my progress, practical tips, and valuable resources that you can use to build your own homestead.

    Stay tuned for next Monday’s post, where I’ll dive into the first topic of my self-taught homesteading curriculum: Soil Science. Together, we’ll explore the fascinating world beneath our feet and learn how to create healthy, productive soil for our gardens.

    Thank you for being a part of this journey. I can’t wait to share more with you and hear about your own homesteading experiences. Let’s make our dreams of a self-sufficient, sustainable life a reality!

    Happy Homesteading!

  • Maximizing Small Spaces: Essential Urban Garden Tips

    Maximizing Small Spaces: Essential Urban Garden Tips

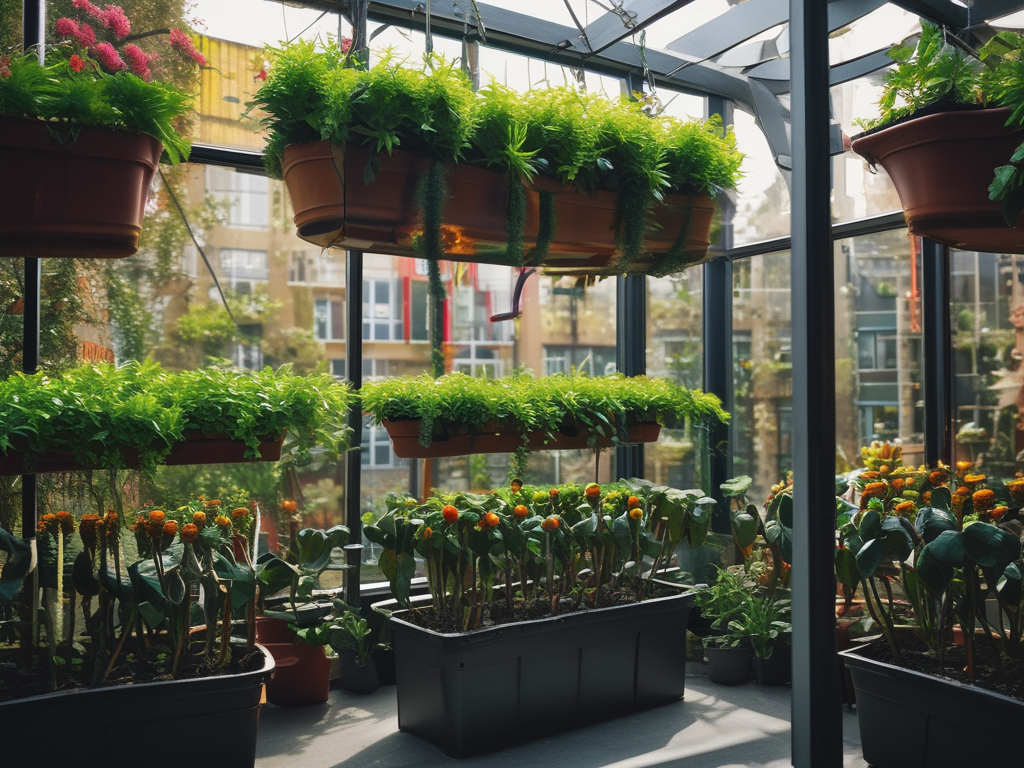
    As more people seek sustainable and self-sufficient lifestyles, urban gardening has become a popular way to grow fresh, healthy produce right at home. Whether you have a tiny balcony, a small backyard, or even just a sunny windowsill, you can cultivate a thriving garden in the city. Today, I’ll share essential tips for starting your urban garden, including assessing your space, container gardening, vertical gardening techniques, and suggested plants for beginners.

    Introduction to Urban Gardening and Its Benefits

    Urban gardening allows city dwellers to connect with nature, reduce their carbon footprint, and enjoy homegrown food. The benefits are numerous:

    Fresh Produce: Grow your own vegetables, herbs, and fruits without the need for long transportation, ensuring fresher and more nutritious food.

    Sustainability: Reduce food waste and minimize environmental impact by growing what you need.

    Mental and Physical Health: Gardening is a great way to relieve stress, stay active, and enjoy the outdoors.

    Community Building: Engage with neighbors and fellow gardeners, sharing tips and produce.

    Tips for Assessing Available Space and Light Conditions

    Before starting your urban garden, evaluate your available space and light conditions:

    Space Assessment: Measure your gardening area, including balconies, patios, windowsills, and any other potential spots.

    Sunlight: Observe how much sunlight your space receives throughout the day. Most vegetables and herbs need at least 6-8 hours of direct sunlight. Use a sunlight calculator app or simply take note of sunny spots.

    Vertical Potential: Identify walls, fences, and railings where you can implement vertical gardening techniques to maximize space.

    Recommendations for Container Gardening

    Container gardening is perfect for small spaces. Here’s what you need to know:

    Container Types:

    Pots and Planters: Available in various sizes and materials. Choose those with good drainage.

    Grow Bags: Flexible, breathable, and great for root health.

    Repurposed Containers: Buckets, crates, and even old furniture can be turned into planters.

    Soil Mix:

    • Use a high-quality potting mix that retains moisture and provides good drainage.

    • Enrich the soil with compost to add nutrients.

    • Avoid using garden soil, which can be too dense for containers.

    Overview of Vertical Gardening Techniques

    Vertical gardening is an excellent way to maximize space and increase yield:

    Trellises and Arches: Ideal for climbing plants like beans, cucumbers, and peas.

    Wall Planters: Use mounted planters or pocket systems to grow herbs, strawberries, and small greens.

    Hanging Baskets: Perfect for trailing plants like tomatoes, strawberries, and herbs.

    Vertical Towers: Stackable planters or towers that allow you to grow multiple plants in a compact space.

    DIY Solutions: Use items like shoe organizers or pallets for creative vertical gardening setups.

    Suggested Plants for Beginners and Small Spaces

    Starting with easy-to-grow plants ensures early success and boosts confidence. Here are some great choices for beginners:

    Herbs: Basil, mint, parsley, chives, and thyme thrive in containers and require minimal care.

    Leafy Greens: Lettuce, spinach, and kale grow quickly and can be harvested multiple times.

    Tomatoes: Cherry or dwarf varieties are ideal for small spaces and containers.

    Peppers: Bell peppers and chili peppers are compact and productive.

    Radishes: Fast-growing and perfect for small spaces.

    Beans: Pole beans can climb trellises, making them excellent for vertical gardening.

    Conclusion

    Starting an urban garden is a rewarding journey that brings fresh produce and a sense of accomplishment. By assessing your space, choosing the right containers, and implementing vertical gardening techniques, you can create a thriving garden even in the smallest spaces. Start with beginner-friendly plants, and soon you’ll be enjoying the fruits (and vegetables) of your labor.

    Thank you for joining me on this journey at LitFoxFarm. Stay tuned for more tips, tutorials, and updates as we grow together!

    Happy gardening!

    Lindsay

  • LitFoxFarm: A Sustainable Urban Gardening Journey | Growing Guides, Tips & More

    LitFoxFarm: A Sustainable Urban Gardening Journey | Growing Guides, Tips & More

    Hello and welcome to LitFoxFarm!

    I’m Lindsay, an avid gardener with a passion for sustainability and a dream to turn my small urban(ish) space into a thriving, productive farm. Nestled at the tippy top of New Jersey, LitFoxFarm is my journey of transforming a 1/4 acre backyard and front yard into a green oasis filled with fresh vegetables, vibrant flowers, and sustainable practices.

    Why LitFoxFarm?

    Gardening has always been a part of my life, sparked by fond memories of helping my grandfather raise worms and cultivate a small garden. Despite the challenges and a few humorous mishaps along the way, my fascination with growing things never faded. Today, I’m combining my love for gardening with my passion for sustainability, aiming to create a farm that not only feeds my family but also brings joy and inspiration to my community.

    What You Can Expect

    At LitFoxFarm, we believe in the power of variety and the importance of sustainable practices. Here’s what you can look forward to:

    Growing Guides: Detailed guides on how to grow a variety of vegetables, herbs, and flowers, even in small spaces.

    Sustainable Practices: Tips on composting, rainwater collection, and organic pest control to keep your garden eco-friendly.

    Project Updates: Follow along as we expand our garden, introduce new crops, and implement innovative farming techniques.

    Community Connection: Opportunities to connect with fellow gardeners, attend workshops, and share experiences.

    Join Me on This Journey

    Whether you’re an experienced gardener or just starting out, I invite you to join me on this journey of creativity, craftsmanship, and sustainable living, all nurtured with a touch of love. Let’s get our hands dirty and grow something beautiful together!

    Thank you for visiting LitFoxFarm. Stay tuned for more posts filled with tips, tutorials, and updates on our progress. Together, we can cultivate a greener future, one plant at a time.

    Lindsay