Tag: LitFoxFarm

  • Making Money with a Roadside Flower Stand

    Making Money with a Roadside Flower Stand

    I have a confession.

    My roadside flower stand does not currently exist.

    At the moment, it is mostly a suspiciously detailed daydream involving buckets of zinnias, dahlias, sunflowers, a cute little self-serve stand near the road, and me somehow becoming the kind of person who casually says things like, “I need to restock the bouquets.”

    Which is how most of my ideas begin, if we’re being honest.

    First, I plant six sunflowers.

    Then I do math.

    Then suddenly I’m mentally operating a small agricultural enterprise.

    So naturally, I started wondering:

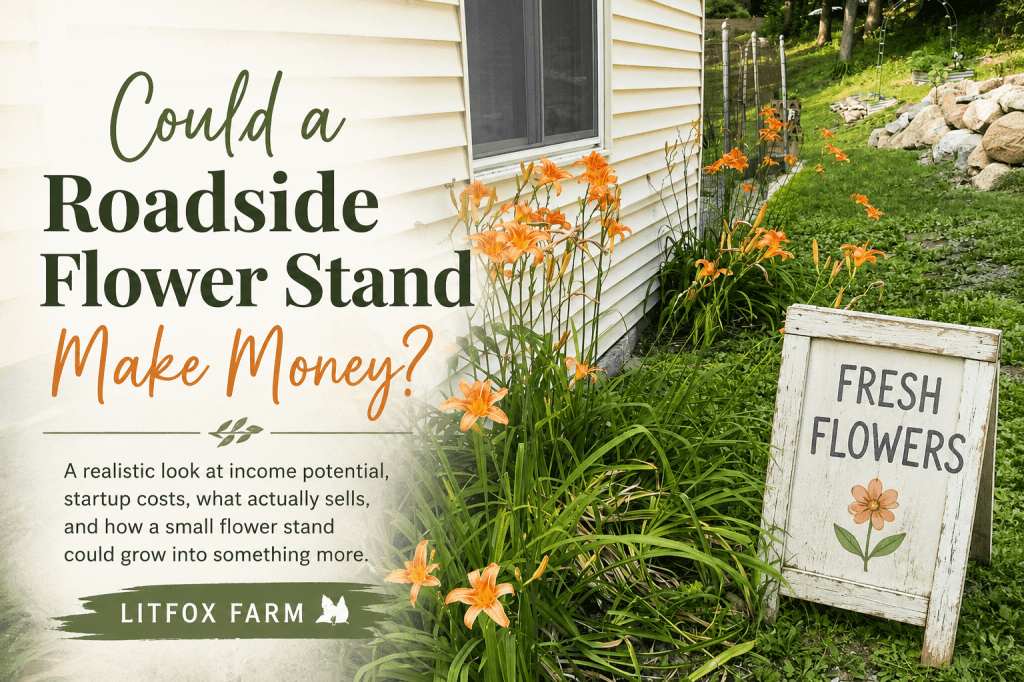
    Could a roadside flower stand actually make money?

    Not internet money.

    Not “one woman made $100,000 selling flowers and therefore obviously you can too” money.

    I mean real, ordinary-person money.

    Could someone with a small property, a patch of decent sunlight, and a willingness to grow a slightly unreasonable number of flowers create a roadside stand that actually brings in meaningful income?

    Let’s investigate.

    First: What Do I Mean by a Roadside Flower Stand?

    I’m not talking about opening a full florist shop.

    I’m thinking something much smaller:

    • A self-serve stand at the edge of your property
    • Wrapped bouquets or mason jar arrangements
    • A cash box, QR code, or digital payment option
    • Limited hours or weekend-only sales
    • Flowers grown primarily on your own property
    • Maybe a few add-ons as the business grows

    The simplest version might be a table with six bouquets and an honor box.

    The more developed version could eventually include:

    • Mixed bouquets
    • Single-variety bunches
    • Sunflower bunches
    • Dahlia bouquets
    • Dried flowers
    • Herb bundles
    • Seasonal wreaths
    • Seed packets
    • Plant starts
    • Garlic
    • Pumpkins
    • Whatever else your particular little patch of earth is producing

    That last part is important because I don’t think the most interesting question is whether flowers alone can make money.

    I think the bigger question is whether a flower stand can become the front door to a tiny farm business.

    The Very Basic Flower Stand Math

    Let’s start small.

    Suppose you sell bouquets for $15 each.

    If you sell:

    • 5 bouquets per week = $75
    • 10 bouquets per week = $150
    • 20 bouquets per week = $300

    Now assume a 20-week selling season.

    That gives us:

    • 5 bouquets/week = $1,500 gross seasonal revenue
    • 10 bouquets/week = $3,000 gross seasonal revenue
    • 20 bouquets/week = $6,000 gross seasonal revenue

    That is gross revenue, not profit.

    We still have to account for things like:

    • Seeds
    • Tubers
    • Corms
    • Compost
    • Fertilizer
    • Irrigation
    • Bouquet sleeves
    • Rubber bands
    • Jars or containers
    • Signage
    • Stand construction
    • Payment processing
    • Unsold flowers
    • Your time

    Still, this is where the idea starts getting interesting.

    Because I am not looking at this and thinking:

    Great. I shall immediately quit my job and become the Dahlia Baroness of Sussex County.

    I’m thinking:

    Wait. Could a patch of flowers pay for itself?

    Could it pay for next year’s seeds?

    Could it pay for a new raised bed?

    Could it cover the cost of irrigation?

    Could it fund a greenhouse?

    Could it eventually become one of several small income streams coming from the same property?

    That is a much more realistic—and, frankly, more useful—question.

    What If the Stand Sold 10 Bouquets Per Week?

    Let’s play with a middle-of-the-road example.

    Imagine a small roadside stand selling:

    10 bouquets per week at $15 each

    That is:

    $150 per week

    Over 20 weeks:

    $3,000 gross revenue

    Now suppose your direct annual flower-stand expenses came to $1,200.

    That would leave:

    $1,800 before taxes and before assigning a value to your own labor.

    Is $1,800 life-changing money?

    Probably not.

    But could $1,800 pay for:

    • A substantial seed order?
    • Irrigation improvements?
    • A new growing bed?
    • Part of a greenhouse?
    • Fruit trees?
    • A pressure canner?
    • Backup water storage?
    • Next year’s flower production?

    Absolutely.

    And this is where I think small-scale farm income gets underestimated.

    Not every income stream needs to replace a salary.

    Sometimes one little enterprise pays for the infrastructure that makes the next enterprise possible.

    The Better Question Might Be: How Much Can You Sell Per Customer?

    A $15 bouquet is one thing.

    But what if someone stops and buys:

    • One $15 bouquet
    • One $6 herb bundle
    • One $8 bag of garlic
    • One $5 packet or bundle of dried flowers

    Suddenly, that customer is worth $34 instead of $15.

    This is why I keep coming back to the idea of the roadside stand as a platform rather than a single product.

    Flowers get attention.

    They are beautiful.

    They are visible from the road.

    They create the:

    “Oh! What’s that?”

    moment.

    But once someone stops, the stand could eventually offer whatever makes sense for the property and season.

    At LitFox Farm, I can imagine some combination of:

    • Fresh bouquets
    • Sunflower bunches
    • Dahlias
    • Zinnias
    • Dried flowers
    • Lavender
    • Herbs
    • Garlic
    • Saffron-related products where legally appropriate
    • Plant starts
    • Seasonal zines
    • Small handmade goods

    Not all at once.

    I am one woman, not a rural Target.

    But over time? The possibilities start stacking.

    A Roadside Flower Stand Has One Huge Advantage: Low Overhead

    A traditional retail flower business may need commercial space, regular staffing, refrigeration, significant inventory, and consistent operating hours.

    A tiny roadside stand can potentially start much leaner.

    The smallest version might use:

    • Flowers you already grow
    • A basic table or stand
    • Simple signage
    • Bouquet sleeves
    • A secure payment method
    • Limited inventory

    You could test demand before building the adorable permanent farm stand currently living rent-free in your Pinterest board.

    That matters.

    Because one of the easiest ways to turn a charming side business into an expensive regret is to build all the infrastructure before confirming that anyone wants to buy the thing.

    A smarter progression might be:

    Year 1: Occasional pop-up table

    Year 2: Consistent weekend stand

    Year 3: Small permanent self-serve structure

    Year 4: Expanded seasonal products

    Year 5: Congratulations, apparently we have accidentally built a tiny farm business.

    That progression makes far more sense to me than spending thousands of dollars upfront because three people on Instagram said roadside stands are “passive income.”

    Spoiler: This Is Not Passive Income

    The stand may sell while you are doing something else.

    The flowers do not grow themselves.

    There is:

    • Bed preparation
    • Seeding
    • Transplanting
    • Watering
    • Weeding
    • Staking
    • Pest management
    • Harvesting
    • Conditioning
    • Arranging
    • Wrapping
    • Pricing
    • Restocking
    • Cleaning
    • Tracking what sells
    • Crying quietly when the weather behaves like weather

    A self-serve stand can reduce the amount of time spent physically staffing a sales location.

    That does not make the business passive.

    It makes it asynchronous.

    And I think that distinction matters.

    Location Could Make or Break the Whole Thing

    You can grow the prettiest dahlias in New Jersey, but if your stand is hidden on a road where six cars pass per day—and four of them are the same neighbor—you may have a problem.

    A roadside stand benefits from:

    • Safe pull-off space
    • Good visibility
    • Clear signage
    • Enough traffic
    • Easy payment
    • Consistent availability
    • Customers who can stop without feeling like they are trespassing

    This is one reason I would test before investing heavily.

    Put out a small number of bouquets.

    Track:

    • How many sell
    • What days sell best
    • What price points move
    • Which flowers disappear first
    • Whether people pay reliably
    • Whether weather affects sales
    • Whether customers return

    The first season should be an experiment, not a coronation.

    The Honor-System Question

    Yes, theft is possible.

    So is underpayment.

    So is someone scanning your payment code, deciding they’ll “do it later,” and vanishing into the universe with your best bouquet.

    That risk has to be considered.

    But I would not automatically assume the answer is to build Fort Knox around twelve zinnias.

    Instead, I’d test:

    • Low inventory at first
    • Clear pricing
    • Multiple payment options
    • A locked cash box
    • Good visibility
    • Strategic stand placement
    • Restocking in small batches

    If losses become meaningful, adjust.

    Again: evidence before drama.

    What Could Make a Small Flower Stand More Profitable?

    My suspicion is that profitability improves when the grower gets better at five things.

    1. Growing the Right Flowers

    Not every flower makes a great cut flower.

    A profitable stand needs flowers that offer some combination of:

    • Strong stems
    • Good vase life
    • High productivity
    • Repeat blooming
    • Customer appeal
    • Efficient harvesting

    This is one reason flowers like zinnias and sunflowers keep showing up in small flower-farm conversations.

    And yes, this is also me publicly justifying the zinnias and sunflowers I already planted.

    Convenient.

    2. Succession Planting

    A beautiful stand for two weeks is lovely.

    A stand with something to sell across a longer season is a business.

    That means thinking about:

    • Early season
    • Midseason
    • Late season
    • Repeated sowings
    • Bloom gaps
    • Weather risk

    The goal is not merely to grow flowers.

    The goal is to have flowers when customers want to buy them.

    3. Increasing Average Transaction Value

    A customer stopping for one bouquet is good.

    A customer stopping for a bouquet plus garlic plus herbs is better.

    This is where a diversified micro-farm may have an advantage.

    4. Building Repeat Customers

    The dream is not constantly convincing new strangers that flowers exist.

    The dream is someone thinking:

    “I need something for my mother-in-law. I’ll stop at that little flower stand.”

    That habit has value.

    5. Tracking What Actually Sells

    Not what you love.

    Not what Pinterest loves.

    Not what looked adorable in the seed catalog at 11:47 p.m. in February.

    What actually sells.

    If $12 sunflower bunches disappear and elaborate $25 mixed bouquets sit there wilting, the stand is telling you something.

    Listen.

    So… Could a Roadside Flower Stand Actually Make Money?

    I think the answer is:

    Yes—but probably not in the magical way the internet sometimes suggests.

    A small roadside flower stand could potentially create:

    • A few hundred dollars in experimental first-season sales
    • A few thousand dollars in seasonal gross revenue
    • A meaningful contribution toward garden or farm infrastructure
    • A customer base for additional farm products
    • A stepping stone into a larger cut-flower or micro-farm business

    Could it replace a full-time salary?

    That would require a very different scale, production system, market, and business model than the tiny self-serve stand I’m imagining here.

    But could a modest flower patch become a small income-producing asset?

    I think so.

    And that is enough to make me curious.

    The LitFox Farm Verdict

    Startup cost: Low to moderate, depending on existing infrastructure

    Time to first dollar: Potentially one growing season

    Part-time friendly: Yes, with serious caveats during planting and harvest periods

    Customer interaction: Low to moderate with a self-serve model

    Physical demand: Moderate to high

    Scalability: Moderate

    Income potential: Modest at tiny scale, increasingly interesting as products and customer traffic expand

    Biggest hidden headache: Producing consistent, saleable inventory instead of one glorious explosion of flowers followed by absolutely nothing

    Internet hype risk: Medium

    LitFox verdict: Worth experimenting with—especially if you already want to grow flowers anyway.

    And that last part may be the deciding factor for me.

    I am already building the flower patch.

    I already want the zinnias.

    I already want the dahlias.

    I already planted the sunflowers.

    So perhaps the first goal does not need to be:

    Build a profitable flower business.

    Maybe the first goal is simply:

    Grow enough flowers to put six bouquets by the road and see what happens.

    That feels like a very LitFox Farm kind of experiment.

    And unfortunately for everyone around me, I am now doing math again.

    Thinking about starting your own roadside flower stand? 🌻

    I’m considering creating a practical, no-hype Quick-Start Guide covering startup costs, what to grow, pricing, stand setup, keeping bouquets fresh, and what it could realistically take to make your first sales.

    Join the interest list and I’ll let you know if I publish it.

  • The Joy of Gardening: Embracing Life’s Seasons

    The Joy of Gardening: Embracing Life’s Seasons

    Two years ago, I thought I was starting a gardening blog.

    Turns out, I was mostly planting ideas.

    Life had other plans.

    Since my last post, I’ve changed jobs twice, become intimately familiar with the court system (zero stars, would not recommend), welcomed my fifteen-year-old son into our home full-time, and discovered that adulthood is mostly just Googling things while reheating your coffee for the third time.

    It was… a season.

    Not the kind where you’re deciding whether to plant tomatoes or peppers.

    The kind where you’re just hoping everyone (including yourself)makes it through the week.

    And yet, every time life got loud…

    I ended up outside.

    Not because I had some grand homesteading plan.

    Because that’s where I could finally hear myself think.

    Some people meditate.

    Apparently, I weed.

    The Garden Didn’t Ask Me to Perform

    One thing I’ve been realizing lately is that the garden doesn’t care who I am Monday through Friday.

    It doesn’t care about corporate job titles.

    It doesn’t care about meetings.

    It doesn’t care if my planner is color-coded or if my inbox is overflowing.

    The basil has never once asked for my quarterly goals.

    It simply asks,

    “Hey… are we watering today?”

    Honestly?

    That’s refreshing.

    Somewhere along the way I realized LitFoxFarm has quietly become the one place where I don’t feel like I have to perform.

    No masking.

    No pretending I have everything figured out.

    No picture-perfect homestead where every carrot grows straight and every sourdough loaf belongs on Pinterest.

    Just dirt under my nails.

    Fresh herbs on the kitchen counter.

    Bread cooling on a rack.

    Pesto made from basil I grew myself.

    Tiny moments that somehow feel much bigger than they should.

    So… What Even Is LitFoxFarm?

    At the moment?

    It’s wonderfully unimpressive.

    I have a horseshoe-shaped in-ground garden out front.

    Two 2×8 raised beds with an archway.

    One Garden Tower.

    Two first-year apple trees.

    A little crescent garden filled with lavender, catnip, and an unreasonable number of garden gnomes.

    A pair of wild raspberry briars that have decided this is their property now.

    A mushroom shelf that’s currently teaching me humility.

    Some herbs.

    A few vegetables.

    One patch of borage.

    And approximately 937 ideas.

    Somewhere in there is the beginning of a tiny farm.

    The Dream

    I can already see it.

    A patch of cut flowers swaying in the breeze.

    Honey bees buzzing between blooms.

    Garlic hanging to cure.

    Fresh bouquets waiting on a little roadside stand.

    Homemade beeswax candles.

    Goat milk soap.

    Plant starts.

    Eggs.

    Herbs.

    Maybe a pumpkin patch.

    Maybe ducks.

    Probably chickens.

    Definitely goats who believe they’re middle management.

    I don’t know exactly what LitFoxFarm becomes.

    But I know how I want it to feel.

    Warm.

    Real.

    A little wild around the edges.

    Like the kind of place where someone stops for honey and accidentally stays for twenty minutes talking about tomatoes.

    Here’s the Honest Part

    Will this become another abandoned blog?

    Honestly…

    Maybe.

    I’d love to tell you I’ve suddenly become the kind of person who publishes every Tuesday at precisely 8:00 a.m. while sipping herbal tea and radiating organizational excellence.

    But that’s probably not how this story goes.

    Consistency and I are still negotiating our contract.

    What is different this time is that I’m not trying to become someone else.

    I’m following something that keeps pulling me back.

    Joy.

    And it turns out joy looks suspiciously like dirt under my fingernails, vegetables on my kitchen counter, homemade bread, and learning the difference between a honey bee and a bumble bee because apparently that matters now.

    Who knew?

    What You Can Expect Around Here

    This isn’t going to be a blog where I pretend to have all the answers.

    I’m learning as I go.

    Some things will thrive.

    Some things will flop spectacularly.

    You’ll see both.

    We’ll talk about gardening.

    Flowers.

    Herbs.

    Bread.

    Pesto.

    Mushrooms (assuming they decide to participate eventually).

    Building a tiny farm.

    Building a tiny business.

    And figuring out whether it’s actually possible to create a beautiful little life one season at a time.

    If everything goes according to plan, LitFoxFarm might become a small business that helps support our family while letting me spend more time doing work that feels meaningful.

    If everything goes completely sideways…

    I’ll still have fresh tomatoes, homemade pesto, and hopefully enough flowers to brighten the kitchen table.

    Honestly, that’s not a terrible backup plan.

    Currently Growing

    🌱 In the garden: Jalapeños, herbs, borage, first-year apple trees, wild raspberries, vegetables that are doing their best.

    🌻 On the wishlist: Cut flowers, garlic, honey bees, pumpkins, a proper flower patch.

    🍞 In the kitchen: Homemade bread, butter, pesto, and whatever the garden decides we’re eating this week.

    🦊 In my head: Roughly 937 ideas… and one tiny farm that feels a little more possible than it did yesterday.

    Thanks for stopping by.

    Take off your shoes if you’d like.

    Just watch out for the garden gnomes—they’re unionized.

  • Sustainable Agriculture Design: Introduction to Permaculture Principles

    Sustainable Agriculture Design: Introduction to Permaculture Principles

    Welcome back, fellow homesteaders! This week, we’re embarking on an exciting journey into the world of permaculture. Based on the book “Introduction to Permaculture” by Bill Mollison and Reny Mia Slay, we’ll explore the principles and design strategies that can transform your garden into a self-sustaining ecosystem. Permaculture is a holistic approach to agriculture that works with nature, rather than against it, to create resilient and productive systems.

    Affiliate Disclaimer: 

    This post may contain affiliate links, which means I may receive a small commission at no additional cost to you if you make a purchase through these links. Thank you for supporting my blog and allowing me to continue to bring you valuable content.

    Introduction to Permaculture Principles

    Permaculture is a design philosophy that aims to create sustainable and self-sufficient agricultural systems. It is based on three core ethics and a set of design principles that guide the creation and maintenance of these systems.

    Core Ethics:

    1. Earth Care: Prioritize the health of the planet, ensuring that all systems work in harmony with the natural environment.

    2. People Care: Meet the needs of people by providing healthy food, clean water, shelter, and community.

    3. Fair Share: Distribute surplus resources and ensure that everyone has access to what they need.

    Permaculture Design Principles:

    1. Observe and Interact: Take the time to observe natural systems and interact with them thoughtfully to understand how they function.

    2. Catch and Store Energy: Design systems to capture and store energy from the sun, wind, and water for future use.

    3. Obtain a Yield: Ensure that the systems you create produce useful outputs such as food, water, and energy.

    4. Apply Self-Regulation and Accept Feedback: Monitor your systems, make adjustments as needed, and learn from both successes and failures.

    5. Use and Value Renewable Resources and Services: Utilize resources that are abundant and sustainable, minimizing reliance on finite resources.

    6. Produce No Waste: Design systems to minimize waste by reusing and recycling materials wherever possible.

    7. Design from Patterns to Details: Start with a broad vision and gradually refine the details of your design.

    8. Integrate Rather Than Segregate: Create interconnected systems where elements support and benefit each other.

    9. Use Small and Slow Solutions: Focus on small-scale, incremental changes that are easier to manage and more sustainable.

    10. Use and Value Diversity: Cultivate a diverse range of plants, animals, and microorganisms to increase resilience.

    11. Use Edges and Value the Marginal: Utilize the edges of systems, where different environments meet, to maximize productivity.

    12. Creatively Use and Respond to Change: Be adaptable and innovative in response to changing conditions and new information.

    Key Design Strategies for Sustainable Agriculture

    Permaculture design strategies incorporate these principles to create sustainable agricultural systems. Here are some key strategies:

    1. Zone Planning:

    • Divide your homestead into zones based on how frequently you visit each area. Place frequently visited elements, like your kitchen garden, close to your home, and less frequently visited elements, like orchards or woodlots, further away.

    2. Swales and Contour Planting:

    • Create swales (ditches on contour) to capture and store rainwater, preventing erosion and providing moisture to plants. Plant along the contours to maximize water retention.

    3. Polyculture and Guilds:

    • Grow a diverse range of plants together in mutually beneficial groups called guilds. For example, a fruit tree guild might include the tree itself, nitrogen-fixing plants, ground covers, and pest-repellent plants.

    4. Forest Gardening:

    • Mimic natural forest ecosystems by creating multi-layered gardens with canopy trees, understory shrubs, herbaceous plants, ground covers, and root crops. This approach maximizes space and diversity.

    5. Natural Building Techniques:

    • Use sustainable building materials and methods to construct shelters, greenhouses, and other structures. Techniques like cob building, straw bale construction, and earthbag building are eco-friendly and energy-efficient.

    Examples of Successful Permaculture Systems

    Permaculture has been successfully applied around the world in a variety of climates and contexts. Here are a few inspiring examples:

    1. Zaytuna Farm, Australia:

    • Founded by Geoff Lawton, Zaytuna Farm is a demonstration site for permaculture principles. It features diverse systems including food forests, animal systems, aquaculture, and composting toilets.

    2. The Permaculture Research Institute of Australia:

    • Another project by Geoff Lawton, this site includes extensive gardens, water management systems, and educational programs that showcase permaculture in action.

    3. The Bullock’s Permaculture Homestead, Washington, USA:

    • This family-run homestead integrates fruit trees, vegetables, animals, and natural buildings. It demonstrates how permaculture can thrive in a temperate climate.

    4. The Greening the Desert Project, Jordan:

    • Geoff Lawton’s project in the arid climate of Jordan showcases how permaculture can restore degraded land, improve soil fertility, and create sustainable food systems in challenging environments.

    Conclusion

    Permaculture principles offer a powerful framework for designing sustainable and resilient agricultural systems. By observing natural systems, capturing energy, minimizing waste, and fostering diversity, you can create a thriving permaculture garden on your homestead.

    Stay tuned for next week’s post, where we’ll dive deeper into practical examples and guide you through designing your own permaculture garden based on the principles outlined in “Introduction to Permaculture.”

    Happy Homesteading!

    Feel free to ask any questions or share your thoughts in the comments. Let’s continue to learn and grow together!

  • Boost Your Garden’s Health and Yield with Strategic Crop Choices and Rotation Practices

    Boost Your Garden’s Health and Yield with Strategic Crop Choices and Rotation Practices

    Welcome back, fellow homesteaders! We’ve explored soil testing and soil health over the past few weeks, and we are on week 4 of 8! Halfway there!
    Now it’s time to venture into the exciting world of crop selection and rotation. Choosing the right crops and practicing crop rotation can significantly enhance your garden’s productivity, reduce pest problems, and improve soil health. Let’s get started!

    Choosing the Right Crops for Your Homestead

    Selecting the right crops for your homestead is a crucial step in planning a successful garden. Here are some factors to consider:

    1. Climate and Growing Season:

    • Choose crops that thrive in your local climate and match your growing season. Research the average frost dates and growing zones for your area.

    2. Soil Type and Conditions:

    • Consider your soil’s pH, nutrient levels, and drainage. Some crops prefer specific soil conditions.

    3. Personal Preferences:

    • Grow what you and your family enjoy eating. There’s no point in growing a bountiful crop of something no one likes!

    4. Crop Diversity:

    • Plant a variety of crops to ensure a diverse and resilient garden. This can also help spread the risk of crop failure.

    Examples of Easy-to-Grow Crops:

    Leafy Greens: Lettuce, spinach, kale.

    Root Vegetables: Carrots, radishes, beets.

    Fruiting Vegetables: Tomatoes, peppers, cucumbers.

    Legumes: Beans, peas.

    Benefits of Crop Rotation and Companion Planting

    Crop Rotation:

    Crop rotation involves changing the type of crops grown in a particular area each season. This practice offers several benefits:

    Nutrient Management: Different crops have varying nutrient needs. Rotating crops helps prevent nutrient depletion and balances soil fertility.

    Pest and Disease Control: Many pests and diseases are crop-specific. Rotating crops disrupts their life cycles and reduces infestations.

    Soil Health: Crop rotation improves soil structure and organic matter content, leading to healthier soil.

    Companion Planting:

    Companion planting involves growing certain plants together to enhance growth, deter pests, and improve yields. Here are some popular companion planting combinations:

    Tomatoes and Basil: Basil repels tomato hornworms and enhances tomato flavor.

    Carrots and Onions: Onions repel carrot flies, while carrots deter onion flies.

    Beans and Corn: Beans fix nitrogen in the soil, benefiting corn, while corn provides support for bean vines.

    Planning Your Garden Layout

    A well-planned garden layout maximizes space, promotes healthy plant growth, and makes maintenance easier. Here’s how to plan your garden layout:

    1. Map Your Garden:

    • Draw a rough sketch of your garden space, noting areas with full sun, partial shade, and other important features like water sources.

    2. Divide into Sections:

    • Divide your garden into sections or beds. Raised beds or defined plots help organize your planting areas.

    3. Arrange Crops Strategically:

    • Group plants with similar needs together. Place taller plants where they won’t shade shorter ones.

    • Consider crop rotation and companion planting when deciding where to place each crop.

    4. Allow for Accessibility:

    • Ensure paths between rows or beds for easy access to plants for watering, weeding, and harvesting.

    5. Succession Planting:

    • Plan for succession planting to maximize productivity. As soon as one crop is harvested, plant another in its place.

    Example Garden Layout:

    Bed 1: Leafy greens (lettuce, spinach, kale) in the spring, followed by carrots and onions in the summer.

    Bed 2: Beans and corn as companion plants, followed by a fall planting of garlic and radishes.

    Bed 3: Tomatoes and basil, followed by a cover crop of clover to enrich the soil over winter.

    Conclusion

    Choosing the right crops and practicing crop rotation are fundamental to a successful and sustainable garden. By selecting crops suited to your climate and soil, utilizing companion planting, and planning your garden layout strategically, you’ll maximize your garden’s yield and health.

    Share your crop selection and garden planning experiences in the comments below, and let’s continue to learn and grow together.

    Stay tuned for next week’s post, where we’ll dive into permaculture principles and how they can transform your garden into a self-sustaining ecosystem.

    Happy Homesteading!

    Feel free to ask any questions or share your thoughts in the comments. Let’s continue to learn and grow together!

  • Golden Raspberry Garden Setup: How I (Hopefully) Got it Right

    Golden Raspberry Garden Setup: How I (Hopefully) Got it Right

    Hey there, garden enthusiasts! Welcome back to LitFoxFarm, where I sometimes know what I’m doing. Today, I’m going to spill the tea on my latest (mis)adventure: setting up two golden raspberry plants from FastGrowingTrees.com. (I took advantage of their BOGO deal!)
    Spoiler alert: the rest involves two 24”x24” galvanized raised beds, an arch trellis from Amazon, and a whole lot of “what was I thinking?” moments. Oh, and I documented the chaos on TikTok because why not share the struggle?

    Affiliate Disclaimer: 

    This post may contain affiliate links, which means I may receive a small commission at no additional cost to you if you make a purchase through these links. Thank you for supporting my blog and allowing me to continue to bring you valuable content.

    Choosing the Right Plants

    Golden raspberries – because regular raspberries are just too mainstream, right? I ordered mine from FastGrowingTrees.com, mostly because they had pretty pictures and I like shiny things, and I struggle to pass a good BOGO deal. But hey, they’re known for quality and customer service, so fingers crossed.

    Preparing the Raised Beds

    So, I decided on galvanized raised beds. Why? Because they’re shiny too. Here’s how I (mostly) managed to set them up without any major disasters:

    1. Location: I picked the sunniest spot in the garden. Translation: the spot that seemed the least likely to flood or be a squirrel playground.

    2. Assembly: These beds came with instructions. Did I follow them? Mostly. After some trial and error (and a few choice words), they were up and sort of level.

    3. Soil Preparation: I filled the beds with garden soil and compost, pretending I know what “well-aerated” means. If I can grow something here, anyone can.

    4. A Supportive Spouse: My ever-supportive spouse was there, offering helpful comments like, “Are you sure you know what you’re doing?” and “Should it be that crooked?” Thanks, love. Your unwavering confidence in my gardening skills is truly inspiring. (Insert eye roll here.) But seriously, their occasional extra pair of hands and moral support kept me from spiraling into self doubt.

    Planting the Raspberries

    Planting these golden beauties was supposed to be straightforward. Supposed to be. Here’s my best shot:

    1. Spacing: Planted them dead center because that’s what the pros do (I think).

    2. Planting Depth: Dug holes, placed plants, filled with soil. Not rocket science, but I managed to second-guess myself every step of the way.

    3. Watering: Watered them like they were thirsty toddlers. Here’s hoping they appreciate it.

    Adding the Arch Trellis

    Why an arch trellis? Because it looks fancy and I thought it would make me look like I know what I’m doing. Here’s the drama that unfolded:

    1. Installation: Positioned the trellis between the beds. It’s now securely anchored, or as secure as it gets when I do it.

    2. Training the Canes: These raspberries are going to grow all over the place. I’ll be there, gently guiding them, pretending I’m some sort of plant whisperer.

    Documenting the Process on TikTok

    Because what’s a gardening project without sharing every misstep on TikTok? Check out my clips [@litfox.lynzy] to see the magic (and mess) unfold. From unboxing to planting, it’s all there, complete with background commentary from my inner critic.

    In the End

    Setting up these golden raspberry plants was a ride. Will they thrive? Stay tuned to find out. If I can (hopefully) do this, so can you. Remember, gardening is all about trial, error, and occasionally getting it right. Until next time, happy gardening and may your plants be ever in your favor!

  • How to Design and Maintain a Wildlife-Friendly Garden for Biodiversity

    How to Design and Maintain a Wildlife-Friendly Garden for Biodiversity

    A wildlife-friendly garden is not only a beautiful and dynamic space but also a vital component of a healthy ecosystem. By attracting beneficial animals like birds, bees, and butterflies, you can enhance the biodiversity of your homestead and promote a thriving garden. Here are some tips on how to design and maintain a garden that welcomes and supports these important creatures.

    Why Attract Beneficial Wildlife?

    The Importance of Beneficial Wildlife

    Pollination: Bees, butterflies, and other pollinators are essential for the reproduction of many plants, including fruits and vegetables. They help ensure a bountiful harvest.

    Pest Control: Birds, ladybugs, and other beneficial insects help control pest populations, reducing the need for chemical pesticides.

    Soil Health: Creatures like earthworms and certain beetles aerate the soil and help decompose organic matter, improving soil structure and fertility.

    Biodiversity: A diverse garden ecosystem supports a variety of plants and animals, creating a balanced and resilient environment.

    Designing a Wildlife-Friendly Garden

    Plant a Variety of Native Plants

    Native plants are adapted to your local climate and soil conditions, making them more attractive to local wildlife.

    Diverse Plantings: Include a mix of flowering plants, shrubs, and trees to provide food and habitat for different species.

    Seasonal Blooms: Choose plants that bloom at different times throughout the year to provide a continuous food source for pollinators.

    Provide Water Sources

    Water is essential for all wildlife. Incorporate features like birdbaths, small ponds, or shallow dishes to attract a variety of animals.

    Birdbaths: Keep birdbaths clean and filled with fresh water. Place them in a safe location away from predators.

    Ponds: Even a small pond can attract frogs, insects, and birds. Add aquatic plants to create a balanced ecosystem.

    Create Shelter and Habitat

    Provide safe places for wildlife to nest, hide, and overwinter.

    Nest Boxes: Install birdhouses and bat boxes to provide nesting sites.

    Brush Piles and Logs: Leave small brush piles, logs, and rocks in your garden to offer shelter for insects, amphibians, and small mammals.

    Dense Plantings: Plant shrubs and dense foliage to create hiding spots for birds and small animals.

    Attracting Specific Beneficial Animals

    Birds

    Birds help control pests and pollinate plants. Attract them with food, water, and shelter.

    Feeders: Set up bird feeders with a variety of seeds to attract different species.

    Plants for Birds: Grow plants that produce berries and seeds, such as sunflowers, coneflowers, and elderberries.

    Bees

    Bees are crucial pollinators for many plants. Provide nectar-rich flowers and nesting sites.

    Bee-Friendly Plants: Plant flowers like lavender, borage, and clover, which are rich in nectar and pollen.

    Nesting Sites: Provide bee hotels or leave bare patches of soil for ground-nesting bees.

    Butterflies

    Butterflies add beauty to your garden and play a role in pollination. Attract them with colorful flowers and host plants for their larvae.

    Nectar Plants: Grow a variety of nectar-rich flowers like zinnias, marigolds, and asters.

    Host Plants: Include host plants like milkweed for monarchs and parsley for swallowtails, where butterflies can lay their eggs.

    Beneficial Insects

    Insects like ladybugs and lacewings help control pest populations.

    Habitat Plants: Grow plants like dill, fennel, and yarrow that attract beneficial insects.

    Avoid Pesticides: Minimize or eliminate the use of chemical pesticides to protect beneficial insect populations.

    Maintaining a Wildlife-Friendly Garden

    Practice Sustainable Gardening

    Use eco-friendly gardening practices to support a healthy ecosystem.

    Organic Methods: Avoid synthetic fertilizers and pesticides. Use compost and organic mulches to nourish your soil.

    Water Wisely: Use drip irrigation or soaker hoses to minimize water waste. Water early in the morning to reduce evaporation.

    Weed Management: Hand-pull weeds or use organic mulch to suppress them. Avoid herbicides that can harm wildlife.

    Monitor and Adapt

    Regularly observe your garden to see which plants and features attract the most wildlife. Be prepared to make adjustments based on your observations.

    Keep Records: Maintain a garden journal to track the types of wildlife you see and any changes you make to your garden.

    Be Patient: Creating a wildlife-friendly garden takes time. Be patient and allow nature to find its balance.

    Conclusion

    Designing and maintaining a wildlife-friendly garden not only enhances the beauty and vitality of your homestead but also supports a healthy and balanced ecosystem. By incorporating native plants, providing water and shelter, and practicing sustainable gardening, you can attract beneficial wildlife that will help your garden thrive. Embrace the natural world and enjoy the many rewards of a wildlife-friendly garden. Happy gardening!

  • The Ultimate Guide to Growing Golden Raspberries: Or, as close as I can get

    The Ultimate Guide to Growing Golden Raspberries: Or, as close as I can get

    Alright, folks, gather ’round. It’s time for a tale of ambition, a dash of cluelessness, and (🤞🏻fingers crossed🤞🏻) a whole lot of golden raspberries. If you’ve ever dreamed of adding a sprinkle of golden magic to your garden (or if you just want to look fancy in front of your neighbors), this guide is for you. Honesty, if I can do this, anyone can. #noliesdetected

    Choosing the Right Soil: Dirt Matters, Apparently

    First things first: soil. Not all dirt is created equal, who knew? Golden raspberries are a bit picky, so we need to give them the good stuff. We’re talking about well-drained, slightly acidic soil. I learned this the hard way after my first attempt involved soil that was more like a mud bath. Lesson learned.

    Planting Techniques: Digging Holes and Other Mysteries

    Next up, planting. Digging holes sounds easy, right? Well, it’s a bit more nuanced than my initial “shovel-and-hope” method. You need to dig a hole twice as wide as the root ball but not too deep – golden raspberries like to keep their crowns just at the soil level. Think of it like placing a diva on a pedestal, just the right amount of elevation.

    Watering: Not Too Much, Not Too Little – The Goldilocks Zone

    Watering is where things get tricky. Too much water and you’ve got a raspberry swamp; too little and they’re auditioning for a dried fruit commercial. Aim for about an inch of water per week. I installed a fancy drip irrigation system to handle this because, let’s be honest, I can’t be trusted to remember.

    Pest Control: Fending Off the Tiny Invaders

    Ah, pests. These little intruders seem to think my garden is an all-you-can-eat buffet. The usual suspects are aphids, spider mites, and birds. I’ve tried everything from homemade garlic sprays (which made my garden smell like an Italian restaurant) to netting that turned my garden into a raspberry fort. Whatever works to keep those critters at bay!

    Pruning: Channeling Your Inner Edward Scissorhands

    Pruning is crucial to keep your golden raspberries in check and encourage new growth. This is where you get to play Edward Scissorhands – carefully. Trim the canes in early spring, removing the dead wood and any canes that look weak or sickly. Remember, you’re aiming for a healthy, productive plant, not a botanical mess.

    Fertilizing: Feeding Your Golden Babies

    These golden beauties need their nutrients, and a good fertilizer can make all the difference. Use a balanced, organic fertilizer in early spring and again in late summer. I had a brief stint where I over-fertilized and ended up with giant, leafy monsters – lesson learned. Moderation is key.

    Harvesting: Reaping What You (Hopefully) Sow

    If all goes well (and even if it doesn’t go perfectly), you’ll be harvesting your golden raspberries in late summer. Pick them when they’re firm but juicy. And remember, sharing is caring – or you can just eat them all yourself, no judgment here.

    If I Can Do It, So Can You

    So there you have it – the ultimate guide to growing golden raspberries from someone who’s stumbled through the process. If you want to check out some more info on actually installing the rasied beds, check out last weeks post ->HERE<-

    If I can manage to coax these golden gems out of the ground, trust me, so can you. Happy gardening, and may your raspberries be ever golden!

  • Herbal Remedies: Grow Your Own Medicine Garden with Peppermint, Chamomile, and More

    Herbal Remedies: Grow Your Own Medicine Garden with Peppermint, Chamomile, and More

    Growing your own herbs not only adds fresh flavors to your cooking but also provides a natural pharmacy right in your backyard. Herbal remedies have been used for centuries to treat common ailments, and many of these powerful plants can be easily cultivated in your garden. This post will discuss various herbs, their uses for natural remedies, and how to harvest, prepare, and use them to treat headaches, colds, minor cuts, and more.

    1. Peppermint

    Uses:

    Headaches: Peppermint is known for its soothing properties that can help alleviate headaches.

    Digestive Issues: It can also ease digestive discomfort and nausea.

    How to Grow:

    Planting: Peppermint prefers partial shade and moist soil. It can be grown in containers to prevent it from spreading excessively.

    Harvesting: Harvest the leaves before the plant flowers by cutting the stems just above the first or second set of leaves.

    How to Use:

    Peppermint Tea: Steep a handful of fresh peppermint leaves in boiling water for 5-10 minutes. Drink the tea to relieve headaches and digestive issues.

    Peppermint Oil: Crush fresh leaves and rub the oil on your temples to ease headache pain.

    2. Chamomile

    Uses:

    Sleep Aid: Chamomile is well-known for its calming effects, making it an excellent remedy for insomnia and anxiety.

    Skin Irritations: It can also soothe skin irritations and minor cuts.

    How to Grow:

    Planting: Chamomile prefers full sun and well-drained soil. It can be grown from seeds or transplants.

    Harvesting: Harvest the flowers when they are fully open, typically in the morning after the dew has dried.

    How to Use:

    Chamomile Tea: Steep dried chamomile flowers in hot water for 5-10 minutes. Drink before bedtime to promote restful sleep.

    Chamomile Compress: Make a strong tea, soak a cloth in it, and apply to irritated skin or minor cuts for relief.

    3. Lavender

    Uses:

    Anxiety and Stress: Lavender is renowned for its calming and relaxing properties.

    Minor Burns and Cuts: It also has antiseptic and anti-inflammatory properties.

    How to Grow:

    Planting: Lavender thrives in full sun and well-drained soil. It prefers a slightly alkaline soil.

    Harvesting: Harvest the flowers when they are in full bloom by cutting the stems just above the leaves.

    How to Use:

    Lavender Sachets: Place dried lavender flowers in a sachet under your pillow to promote relaxation and sleep.

    Lavender Oil: Infuse lavender flowers in oil and apply to minor burns and cuts to soothe and heal.

    4. Echinacea

    Uses:

    Immune Support: Echinacea is commonly used to boost the immune system and fight colds and infections.

    Wound Healing: It also has properties that promote wound healing.

    How to Grow:

    Planting: Echinacea prefers full sun and well-drained soil. It can be grown from seeds or transplants.

    Harvesting: Harvest the flowers and leaves when the flowers are fully open.

    How to Use:

    Echinacea Tea: Steep fresh or dried flowers and leaves in hot water for 10-15 minutes. Drink the tea to help fight off colds and infections.

    Echinacea Salve: Infuse dried echinacea in oil, mix with beeswax, and apply to cuts and wounds to promote healing.

    5. Calendula

    Uses:

    Skin Inflammations: Calendula is excellent for treating skin inflammations, rashes, and minor wounds.

    Digestive Health: It also supports digestive health and can be used to treat ulcers.

    How to Grow:

    Planting: Calendula prefers full sun to partial shade and well-drained soil. It can be grown from seeds.

    Harvesting: Harvest the flowers in the morning after the dew has dried, when they are fully open.

    How to Use:

    Calendula Salve: Infuse calendula flowers in oil, mix with beeswax, and apply to skin irritations and minor wounds.

    Calendula Tea: Steep dried calendula flowers in hot water for 5-10 minutes. Drink the tea to support digestive health.

    Conclusion

    Incorporating herbal remedies into your daily routine can provide natural and effective solutions for common ailments. By growing these herbs in your garden, you can have a ready supply of fresh, potent ingredients to support your health. Remember to consult with a healthcare provider before using herbal remedies, especially if you have any underlying health conditions or are taking medications. Happy gardening and healing!

  • Get Your Garden Groove On with Our Free Weekly Planner: Garden Edition! 🌱

    Get Your Garden Groove On with Our Free Weekly Planner: Garden Edition! 🌱

    Hey there, garden warriors and plant enthusiasts! 🌻

    Let’s be real for a second: gardening is tough. Between the relentless weeds that pop up overnight and the plants that demand attention like divas, it’s easy to feel a bit overwhelmed. If you’ve ever found yourself knee-deep in soil, wondering when you last watered that one particularly thirsty plant, I’ve got just the thing for you. Introducing my freebie of the month: the Weekly Planner: Garden Edition!

    Why You Need This Planner

    If your garden looks anything like mine, it’s a beautiful chaos. I mean, sure, we love our plants like our own children, but even the best of us can’t remember everything. Enter the Weekly Planner: Garden Edition – your new best friend in the garden. This planner is designed to help you stay on top of your garden tasks, ensure your plants get the love they need, and ultimately, help your garden flourish. Because let’s face it, we could all use a little help in remembering when to water the tomatoes and when to give those finicky herbs a bit of extra TLC.

    What’s Inside

    Here’s a sneak peek at what you’ll find in our sassy, ever-so-helpful Weekly Planner:

    Weekly Overview: Get a bird’s eye view of your gardening week. Plot out what needs to be done and when so you’re never caught off guard by an unexpected plant tantrum.

    Daily Task Planner: Break down your tasks day by day. Whether it’s watering, weeding, or just giving your plants some much-needed compliments, you’ll have a space to jot it all down.

    Notes Section: Because let’s be honest, gardens come with their fair share of surprises. Use this section to note down any observations, sudden epiphanies, or those brilliant ideas you get while elbow-deep in compost.

    To-Do List: Keep track of those nagging little tasks that need to be done but often slip through the cracks. Like finally fixing that leaky hose or figuring out why the cucumbers have suddenly decided to play hard to get.

    How to Get Your Hands on It

    Ready to bring some order to your garden chaos? Downloading our Weekly Planner: Garden Edition is as easy as pie (or should I say, as easy as planting a seed?). Just click here to grab your free copy and start organizing your garden like the pro you are.

    Why I Love It

    Honestly, this planner has been a game-changer for me. Before, I was the queen of “Oh no, I forgot to water the basil again!” Now, I’m on top of my game, and my plants are thriving. Plus, there’s something incredibly satisfying about checking off those little boxes each day. It’s like giving myself a high-five for adulting properly.

    Final Thoughts

    So, what are you waiting for? Download the Weekly Planner: Garden Edition and take control of your gardening journey. Let’s turn that beautiful chaos into a well-oiled (and well-watered) machine. Happy gardening, and may your plants be ever in your favor!

    Lindsay 🌿

  • Maximizing Small Spaces: Essential Urban Garden Tips

    Maximizing Small Spaces: Essential Urban Garden Tips

    As more people seek sustainable and self-sufficient lifestyles, urban gardening has become a popular way to grow fresh, healthy produce right at home. Whether you have a tiny balcony, a small backyard, or even just a sunny windowsill, you can cultivate a thriving garden in the city. Today, I’ll share essential tips for starting your urban garden, including assessing your space, container gardening, vertical gardening techniques, and suggested plants for beginners.

    Introduction to Urban Gardening and Its Benefits

    Urban gardening allows city dwellers to connect with nature, reduce their carbon footprint, and enjoy homegrown food. The benefits are numerous:

    Fresh Produce: Grow your own vegetables, herbs, and fruits without the need for long transportation, ensuring fresher and more nutritious food.

    Sustainability: Reduce food waste and minimize environmental impact by growing what you need.

    Mental and Physical Health: Gardening is a great way to relieve stress, stay active, and enjoy the outdoors.

    Community Building: Engage with neighbors and fellow gardeners, sharing tips and produce.

    Tips for Assessing Available Space and Light Conditions

    Before starting your urban garden, evaluate your available space and light conditions:

    Space Assessment: Measure your gardening area, including balconies, patios, windowsills, and any other potential spots.

    Sunlight: Observe how much sunlight your space receives throughout the day. Most vegetables and herbs need at least 6-8 hours of direct sunlight. Use a sunlight calculator app or simply take note of sunny spots.

    Vertical Potential: Identify walls, fences, and railings where you can implement vertical gardening techniques to maximize space.

    Recommendations for Container Gardening

    Container gardening is perfect for small spaces. Here’s what you need to know:

    Container Types:

    Pots and Planters: Available in various sizes and materials. Choose those with good drainage.

    Grow Bags: Flexible, breathable, and great for root health.

    Repurposed Containers: Buckets, crates, and even old furniture can be turned into planters.

    Soil Mix:

    • Use a high-quality potting mix that retains moisture and provides good drainage.

    • Enrich the soil with compost to add nutrients.

    • Avoid using garden soil, which can be too dense for containers.

    Overview of Vertical Gardening Techniques

    Vertical gardening is an excellent way to maximize space and increase yield:

    Trellises and Arches: Ideal for climbing plants like beans, cucumbers, and peas.

    Wall Planters: Use mounted planters or pocket systems to grow herbs, strawberries, and small greens.

    Hanging Baskets: Perfect for trailing plants like tomatoes, strawberries, and herbs.

    Vertical Towers: Stackable planters or towers that allow you to grow multiple plants in a compact space.

    DIY Solutions: Use items like shoe organizers or pallets for creative vertical gardening setups.

    Suggested Plants for Beginners and Small Spaces

    Starting with easy-to-grow plants ensures early success and boosts confidence. Here are some great choices for beginners:

    Herbs: Basil, mint, parsley, chives, and thyme thrive in containers and require minimal care.

    Leafy Greens: Lettuce, spinach, and kale grow quickly and can be harvested multiple times.

    Tomatoes: Cherry or dwarf varieties are ideal for small spaces and containers.

    Peppers: Bell peppers and chili peppers are compact and productive.

    Radishes: Fast-growing and perfect for small spaces.

    Beans: Pole beans can climb trellises, making them excellent for vertical gardening.

    Conclusion

    Starting an urban garden is a rewarding journey that brings fresh produce and a sense of accomplishment. By assessing your space, choosing the right containers, and implementing vertical gardening techniques, you can create a thriving garden even in the smallest spaces. Start with beginner-friendly plants, and soon you’ll be enjoying the fruits (and vegetables) of your labor.

    Thank you for joining me on this journey at LitFoxFarm. Stay tuned for more tips, tutorials, and updates as we grow together!

    Happy gardening!

    Lindsay